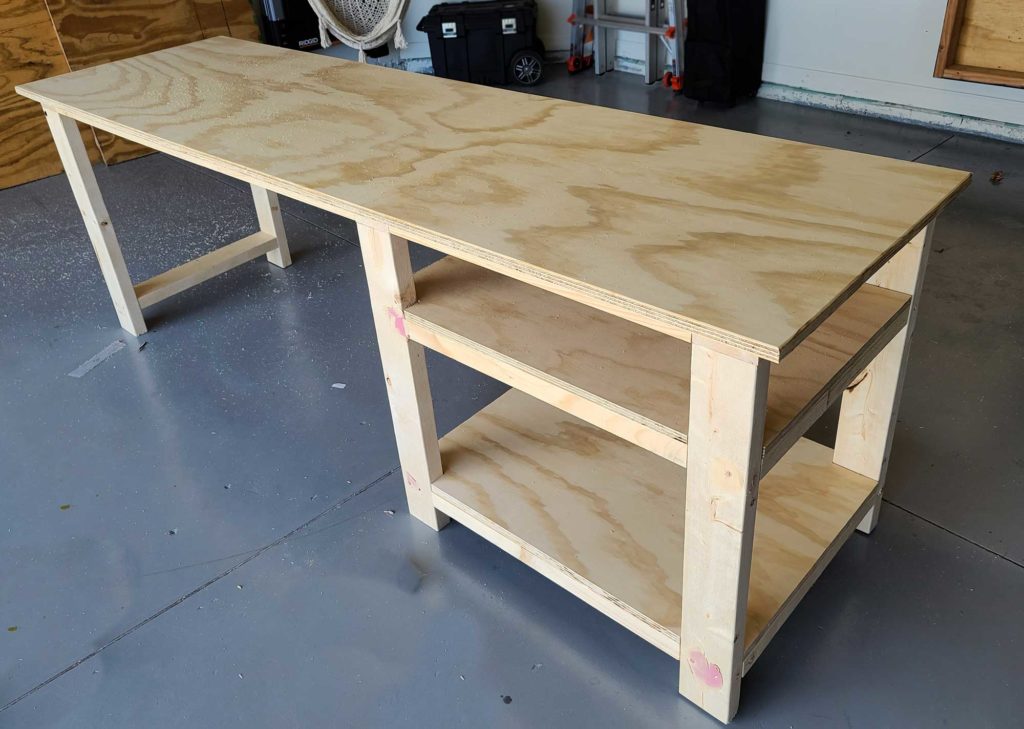
The allure of crafting a piece of furniture from scratch is undeniable. It offers a tangible expression of creativity and a sense of accomplishment. This guide will walk you through the construction of a simple yet functional wooden desk, perfect for a home office or study.
Materials:
Lumber:
Top: 2 pieces of 3/4" thick plywood or solid wood (1" x 24" x 48") for the top panels.
Legs: 4 pieces of 2x4 lumber (8" x 36") for the legs.
Aprons: 2 pieces of 1x4 lumber (1" x 3 1/2" x 48") for the front and back aprons.
Rails: 2 pieces of 1x4 lumber (1" x 3 1/2" x 24") for the side rails.
Fasteners:
Wood screws: 2" and 1 1/4" screws (at least 50 each) for assembling the frame.
Wood glue: For strengthening the joints.
Finishing Supplies:
Wood filler: To fill any gaps or imperfections.
Sandpaper: 80 grit, 120 grit, and 220 grit for smoothing surfaces.
Wood stain or paint: Your choice of finish (optional).
Polyurethane or varnish: For a protective coating (optional).
Tools:
Tape measure: For accurate measurements.
Pencil: For marking wood.
Saw: Circular saw or handsaw for cutting lumber to size.
Drill: With various drill bits for pilot holes and countersinking.
Screwdriver: For securing screws.
Clamps: To hold pieces together while gluing.
Level: To ensure even placement of the legs.
Safety glasses: Protect your eyes.
Dust mask: To prevent inhaling sawdust.
Work gloves: For better grip and protection.
Step 1: Planning and Preparing
1. Design: Decide on the dimensions of your desk. Consider the space you have available and the intended use of the desk. This guide uses standard dimensions for a basic desk, but feel free to adjust based on your needs.
2. Cutting Lumber: Carefully cut all lumber to the specified sizes. Ensure your cuts are precise and straight for a sturdy and aesthetically pleasing desk. Use a saw guide for added precision.
3. Sanding: Smooth the edges and surfaces of the wood pieces using 80-grit sandpaper. This step removes rough edges and prepares the wood for finishing.
Step 2: Assembling the Frame
1. Legs and Aprons: Attach the legs to the aprons using 2" wood screws. Drill pilot holes slightly smaller than the screw diameter to prevent splitting the wood. Countersink the screws for a flush finish. Use wood glue for added strength.
2. Rails: Attach the rails to the aprons using 1 1/4" wood screws. Ensure the rails are parallel and flush with the aprons. Use wood glue for added strength.
3. Strengthening the Frame: After glue has dried, reinforce the frame by adding additional screws through the legs and aprons into the rails. This creates a more robust and stable base for the desk top.
Step 3: Creating the Desk Top
1. Joining the Panels: If using plywood, the two panels can be joined with a simple butt joint. For solid wood, consider a more complex joint like a miter or a lap joint for added strength and stability.
2. Fastening the Panels: Secure the top panels to the frame using screws or specialized desk top fasteners. Countersink the screws for a flush finish. Wood glue can also be used.
Step 4: Finishing Touches
1. Filling Gaps: Fill any gaps or imperfections with wood filler. Allow the filler to dry completely.
2. Sanding: Sand the entire desk surface smoothly using 120-grit and then 220-grit sandpaper. Pay attention to corners and edges.
3. Finishing: Apply your chosen wood stain or paint. Allow the finish to dry completely. For added protection, apply a layer of polyurethane or varnish.
Step 5: Enjoy Your New Desk
1. Positioning and Leveling: Place the desk in its desired location and use a level to ensure all legs are even. Adjust the legs as needed for stability.
2. Decorating: Personalize your new desk with accessories, a lamp, and your favorite office supplies.
Safety Tips
Always wear safety glasses and a dust mask when using power tools.
Use clamps to secure workpieces while drilling or screwing.
Avoid distractions and maintain a clean workspace.
Tips for a Successful Project
Plan Ahead: Carefully plan your design and measure twice before cutting.
Quality Materials: Use high-quality lumber and fasteners for a sturdy and long-lasting desk.
Dry Fit: Assemble the frame without glue to ensure proper alignment before using glue.
Finish Carefully: Take your time with the finishing process for a professional look.
Conclusion
Building a simple wooden desk is a rewarding experience that allows you to craft a functional and personalized piece of furniture. By carefully following these steps, you can create a desk that will serve you well for years to come. Remember to enjoy the process, take your time, and be proud of your accomplishment.


No comments:
Post a Comment