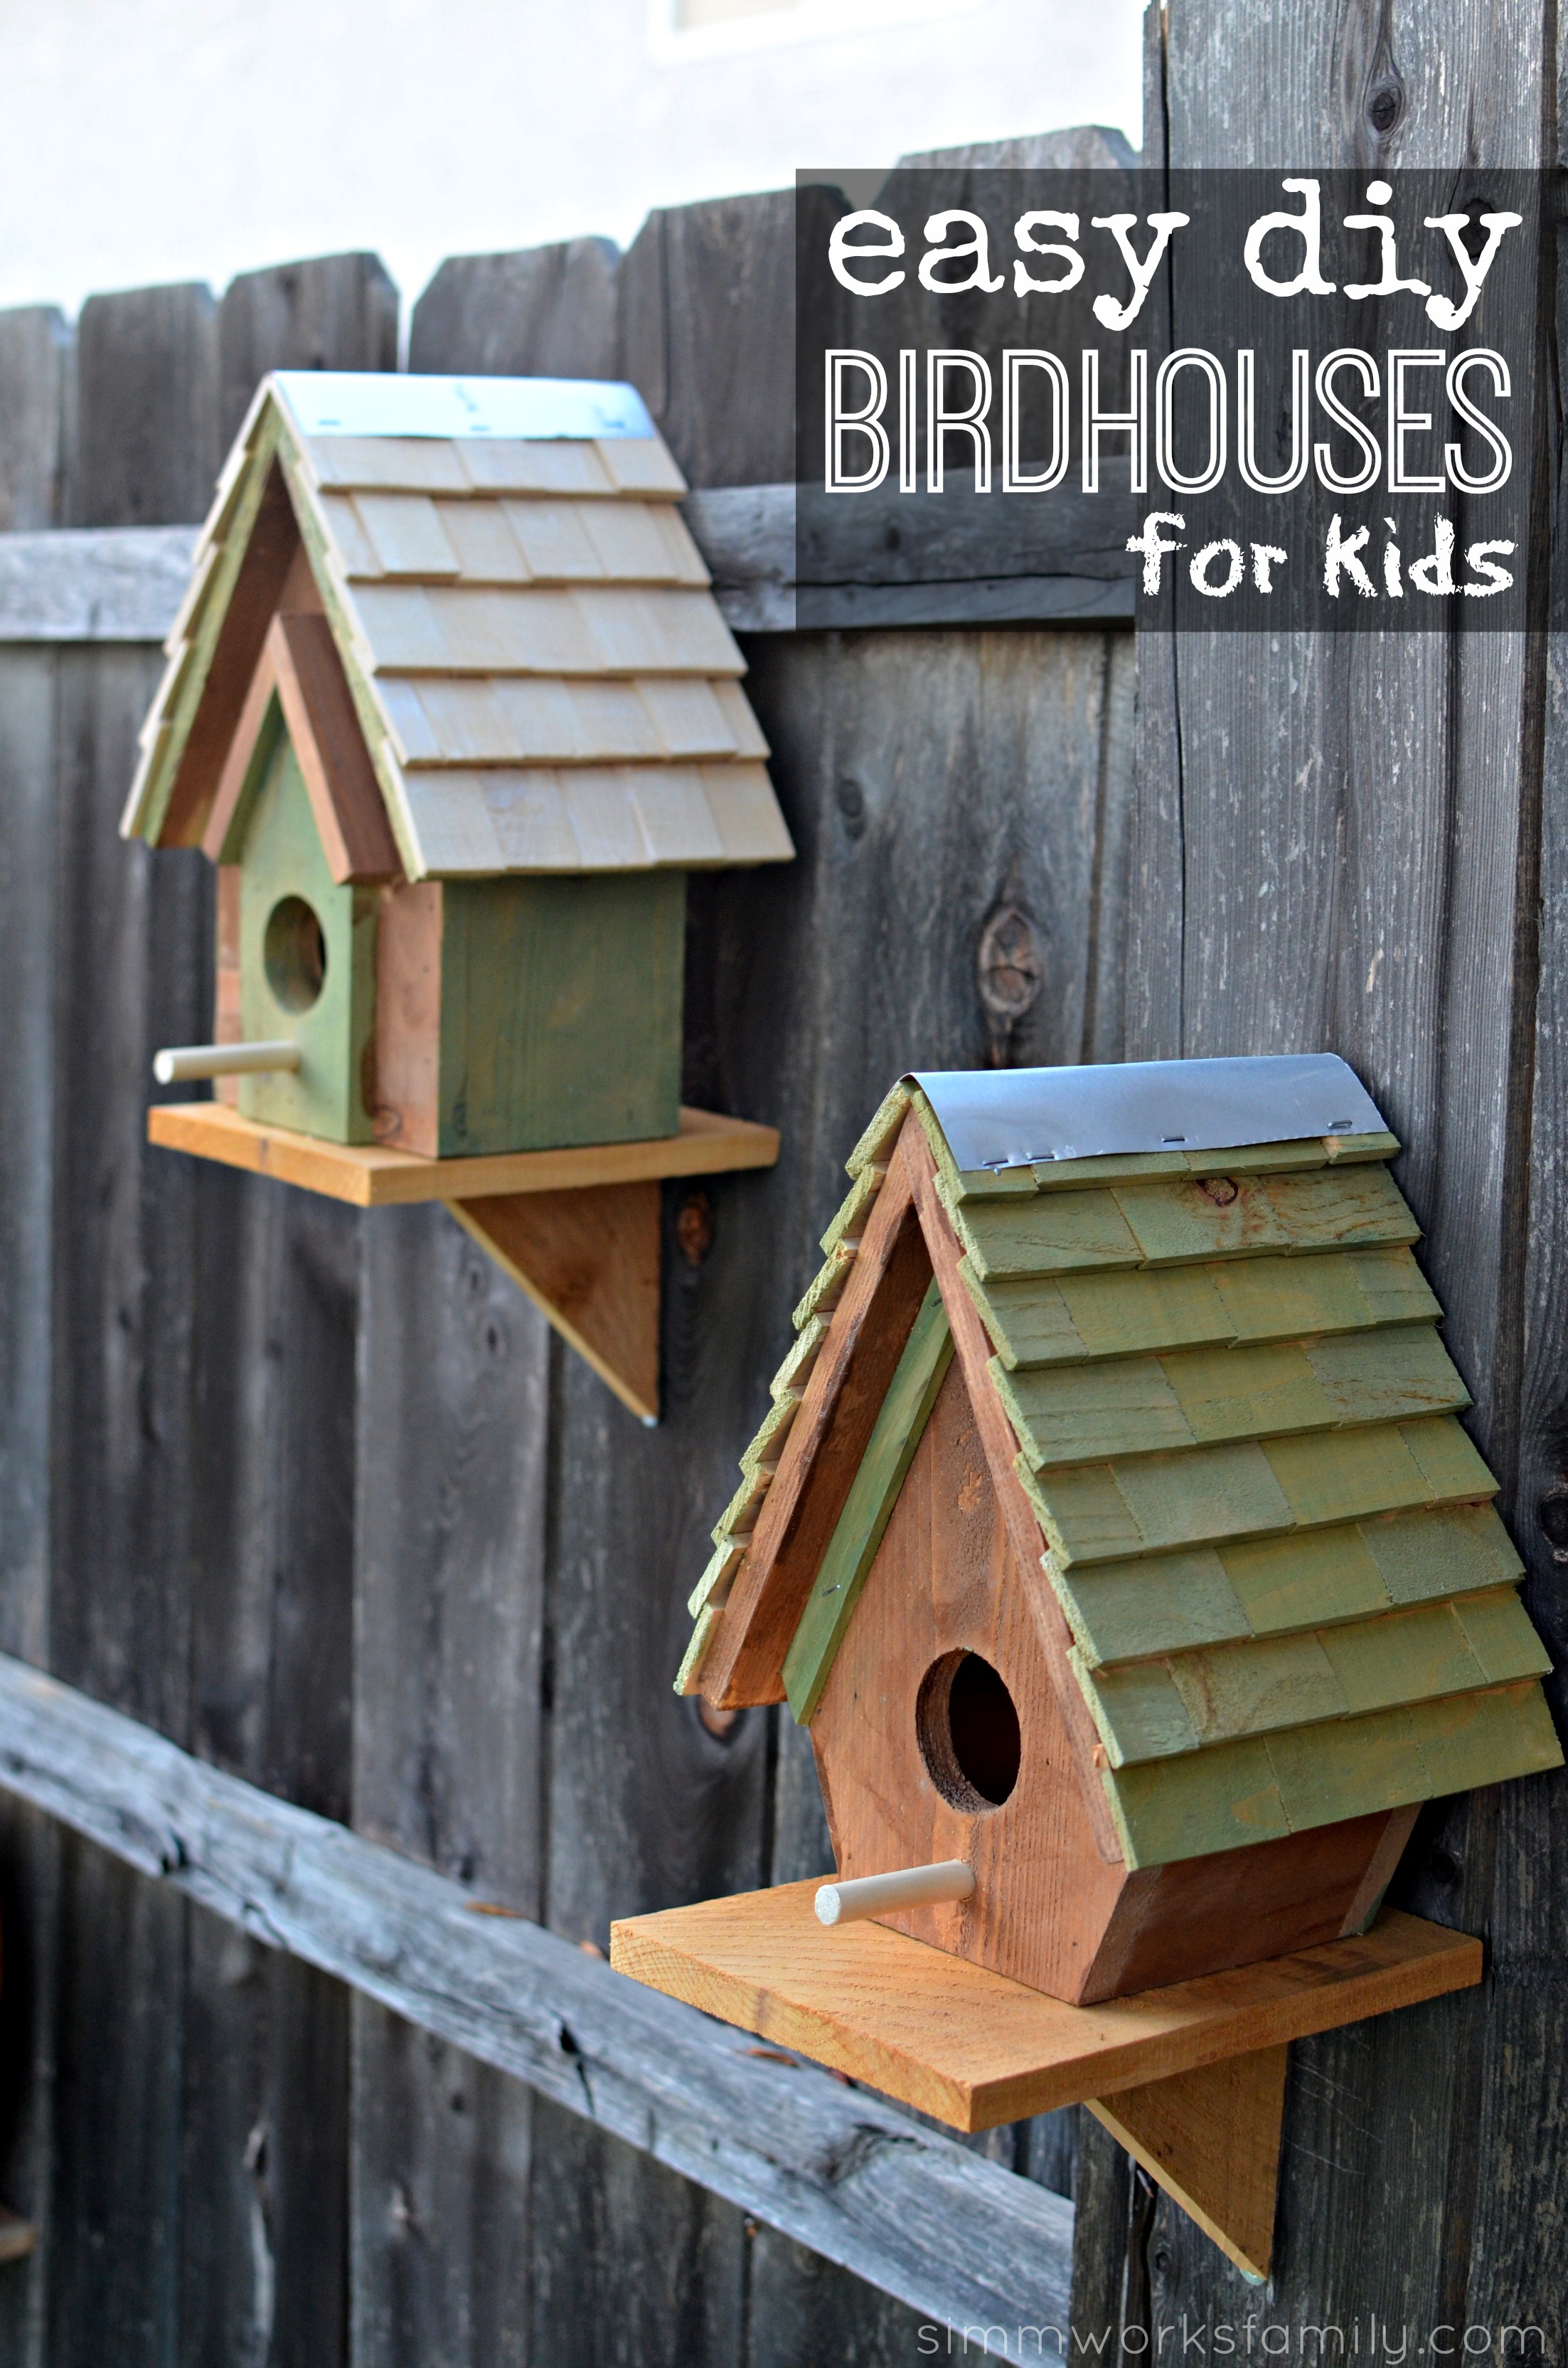
How to Build a Decorative Birdhouse for Your Outdoor Decor

How to Build a Decorative Birdhouse for Your Outdoor Decor

Building a Decorative Birdhouse: Add Charm to Your Garden

Hey there, fellow nature lovers! Are you looking to add a touch of whimsy and charm to your outdoor space? Well, let me tell you, building a decorative birdhouse is the perfect way to do it. Not only will you create a beautiful focal point for your garden, but you'll also provide a safe and cozy home for our feathered friends. Let's dive in and create something special!

Choosing Your Birdhouse Design

The first step in building your birdhouse masterpiece is deciding on its design. Do you want a classic wooden box with a simple roof, or something a little more elaborate? Perhaps you're feeling creative and want to build a birdhouse that looks like a miniature house, a whimsical gnome dwelling, or even a playful ladybug. The possibilities are truly endless!

Here are a few things to consider when choosing your design:

Size and Shape

The size and shape of your birdhouse will depend on the type of birds you're hoping to attract. For smaller birds like chickadees and wrens, a birdhouse with a 1.5-inch entrance hole is perfect. Larger birds like bluebirds and woodpeckers will need a wider entrance, around 2.5 inches. The shape of your birdhouse can also influence its attractiveness to different bird species. For example, a round-shaped birdhouse is favored by wrens, while a square-shaped one is more appealing to bluebirds.

Materials

You can use a variety of materials to build your birdhouse, from traditional wood to more unique materials like recycled metal or even repurposed materials. Wood is a classic choice and is readily available, and it's easy to work with. If you're going for a rustic look, consider using weathered wood, cedar, or pine. For a more modern feel, you can use plywood or even reclaimed wood from old pallets. Just make sure that any materials you choose are safe for birds and won't release any harmful chemicals.

Design Inspiration

Don't be afraid to look for inspiration! Check out websites like Pinterest or browse through birdhouse books at your local library. You can also visit craft stores or garden centers to see examples of birdhouses that have been built by others. Once you find a design you like, you can start gathering the necessary materials and tools to build your own masterpiece.

Gathering the Materials and Tools

Now, let's gather our tools and materials to build your birdhouse. This is the fun part, getting to pick out the materials and tools you'll be using!

Wood

You'll need some wood to build the main structure of your birdhouse. Choose wood that is at least 1/2 inch thick and is weather-resistant. Cedar, pine, and redwood are great choices, but you can also use plywood or even reclaimed wood.

Tools

You'll need some basic tools to cut, shape, and assemble your birdhouse. Here's what you'll need:

  • Saw (circular saw, jigsaw, or hand saw)
  • Drill and drill bits
  • Screwdriver
  • Hammer
  • Measuring tape
  • Level
  • Pencil
  • Safety glasses
  • Gloves

Optional Materials

You can use optional materials to add a unique touch to your birdhouse:

  • Paint and brushes
  • Stain and sealant
  • Decorative accents like birdhouses, flowers, or other nature-inspired elements.

Building Your Birdhouse

Now comes the fun part â€" building your birdhouse! This is your chance to put your creativity to work and create a unique design.

Cut and Shape the Wood

Use your saw to cut the wood into the shapes you need for your birdhouse. For a simple box-style birdhouse, you'll need four sides, a bottom, a roof, and a front panel with an entrance hole. Make sure to cut the wood to the right size so that all the pieces fit together perfectly.

Assemble the Birdhouse

Now it's time to put your birdhouse together. Using your drill and screws, attach the sides, bottom, and roof to create the main structure. Make sure to secure the pieces tightly so that the birdhouse is sturdy and won't fall apart.

Create the Entrance Hole

Use your drill to create the entrance hole in the front panel. The size of the hole will depend on the type of bird you want to attract. Smaller birds will need a 1.5-inch hole, while larger birds need a 2.5-inch hole.

Add Decorative Touches

Once you've built the basic birdhouse structure, you can add decorative touches to make it truly unique. You can paint the birdhouse, stain it, or add decorative accents like flowers, birdhouses, or other nature-inspired elements. Get creative and have fun!

Choosing the Right Location

Now that your birdhouse is built, it's time to find the perfect spot for it in your garden. Here are a few things to keep in mind when choosing a location:

  • Safety: Choose a location that is protected from predators like cats, squirrels, and snakes. Consider placing your birdhouse under a tree branch or on a fence post.
  • Visibility: Place the birdhouse in a visible spot where you can easily watch the birds come and go. But, keep in mind that birds prefer privacy, so don't put it in a spot where it's right in the middle of your walkway.
  • Protection from the Elements: Ensure the location is protected from harsh weather conditions. Consider using a birdhouse with a large roof overhang to shelter the birds from rain and snow.
  • Food and Water Source: Place your birdhouse near a food and water source to make it even more attractive to birds. You can plant native plants or shrubs that provide seeds and berries.

Enjoy Your New Birdhouse!

Congratulations! You've successfully built a decorative birdhouse. Now, all that's left is to watch as birds discover their new home and enjoy the beautiful sight of feathered friends flitting around your garden. Remember to keep the birdhouse clean and provide fresh water for the birds to enjoy. And keep an eye out for baby birds, as you might just be lucky enough to witness a family of birds raising their chicks in your backyard.

Building a decorative birdhouse is a fun and rewarding way to connect with nature and add a touch of whimsy to your outdoor space. So get creative and have fun! Your garden and the birds will thank you for it.
Share:

Step-by-Step DIY Birdhouse Construction for Beginners

Step-by-Step DIY Birdhouse Construction for Beginners

Building a Birdhouse for Beginners

Building a birdhouse is a rewarding and fun project for anyone, regardless of their carpentry experience. It's a great way to connect with nature, attract beautiful birds to your yard, and create a beautiful, functional piece for your outdoor space. This guide provides a step-by-step process for constructing a birdhouse, making it accessible even for first-time builders.

Materials You Will Need

Before you begin, gather the necessary materials. You can use reclaimed wood or purchase new lumber from a hardware store. Here's what you'll need:

  • Wood: Cedar, pine, or redwood are excellent choices for birdhouses.
  • Screws: Use screws specifically designed for wood.
  • Saw: A hand saw or a circular saw for cutting the wood.
  • Drill: A drill with a screwdriver bit is essential for securing the screws.
  • Measuring tape: For accurate measurement.
  • Pencil: For marking the wood.
  • Sandpaper: For smoothing out rough edges and creating a finished look.
  • Optional: Stain or paint to add color and protection to the birdhouse.

Step-by-Step Guide

Step 1: Design and Measure

Choose a birdhouse design that appeals to you. There are countless options online. Determine the size and shape of your birdhouse, keeping in mind the specific bird species you want to attract. Consider the dimensions of the entrance hole, which should be tailored to the birds you'd like to invite. It's a good idea to research the size and shape of the entrance hole for your preferred bird species. Consult online resources or birdwatching guides for helpful information.

Step 2: Cut the Wood

Using your saw, cut the wood pieces according to your design. Carefully measure and mark the wood before making any cuts. Remember, you'll need pieces for the base, sides, roof, and the entrance hole. To ensure a tight fit, make sure the cuts are precise.

Step 3: Assemble the Birdhouse

Assemble the birdhouse by joining the sides, base, and roof. Use wood glue and screws to secure the pieces firmly. Be sure to predrill pilot holes for the screws to prevent splitting the wood. Once the main structure is assembled, create the entrance hole by drilling a circular opening on one of the sides.

Step 4: Sanding and Finishing

Once the birdhouse is fully assembled, use sandpaper to smooth out any rough edges or imperfections. This process will create a more finished and attractive look. If you're using stain or paint, apply it to the birdhouse after sanding. Allow the stain or paint to dry completely before proceeding.

Step 5: Install the Birdhouse

Find a suitable location for your birdhouse. Choose a spot that is protected from wind and rain, and is accessible to birds. Avoid placing the birdhouse directly on the ground, as this can make it vulnerable to predators. Attach the birdhouse to a tree, fence post, or a sturdy structure using nails or screws.

Tips for Attracting Birds

To increase the chances of attracting birds to your new birdhouse, consider these helpful tips:

  • Placement: Place your birdhouse in an area with plenty of natural cover, such as trees or shrubs. Birds will feel more secure in areas that offer protection from predators.
  • Maintenance: Clean the birdhouse regularly to prevent the build-up of debris and parasites. A simple scrub with soapy water is sufficient.
  • Food and Water: Provide a source of food and water for birds. You can hang a feeder near the birdhouse or place a shallow dish of water for them to drink and bathe.
  • Patience: It might take some time for birds to discover your birdhouse. Be patient and don't be discouraged if it doesn't get occupied immediately.

Building a birdhouse is an enjoyable and rewarding project that will allow you to contribute to bird conservation and bring a delightful touch of nature to your surroundings. With a little effort, you can create a welcoming home for birds and enjoy watching them visit your backyard.

Share:

Step-by-step guide to installing a concealed in-wall gun cabinet

Step-by-step guide to installing a concealed in-wall gun cabinet

Installing a Concealed In-Wall Gun Cabinet: A Step-by-Step Guide

A concealed in-wall gun cabinet provides a secure and discreet storage solution for your firearms. This guide outlines the steps involved in installing one, from planning to finishing touches. Remember, safety is paramount, and adhering to local building codes is crucial.

Planning and Preparation

Before you begin, carefully plan your project. Consider the size and location of the cabinet, ensuring it meets your needs and conforms to your home's layout.

Determine Cabinet Size and Location

Measure the space where you intend to install the cabinet, taking into account the wall's thickness and any obstructions. Choose a cabinet size that fits comfortably and provides sufficient storage.

Assess Wall Construction

Investigate the wall's construction to determine its suitability for the weight of the cabinet. Ensure the wall is strong enough to support the load, and identify any potential obstacles such as electrical wires or plumbing.

Gather Materials and Tools

Compile all necessary materials and tools. This typically includes the gun cabinet, framing lumber, drywall, fasteners, insulation, paint, and appropriate tools for cutting, drilling, and securing the cabinet.

Building the Framing

Create a secure framework for the cabinet. This step ensures stability and prevents sagging over time.

Build a Frame

Construct a rectangular frame using framing lumber, ensuring the dimensions match the cabinet's exterior. Securely attach the frame to the wall studs using screws or nails.

Install Wall Studs

If the wall lacks sufficient stud support, install additional studs to provide adequate strength. These studs should be aligned with the cabinet's frame for maximum stability.

Installing the Cabinet

Now, install the cabinet itself, ensuring it is securely attached and level.

Prepare the Cabinet

Clean the cabinet's exterior, and apply any necessary sealant or primer. Ensure all moving parts function smoothly.

Position and Secure the Cabinet

Carefully position the cabinet inside the frame, ensuring it is level. Securely attach the cabinet to the frame using appropriate fasteners.

Finishing Touches

Finally, add the finishing touches, creating a seamless and secure integration into your wall.

Install Drywall

Cover the frame and cabinet with drywall, ensuring a smooth, flush surface. Securely attach the drywall using screws or nails.

Apply Joint Compound

Apply joint compound to the seams of the drywall, creating a smooth transition between the installed cabinet and the surrounding wall. Allow the compound to dry completely.

Paint the Wall

Paint the wall, ensuring a consistent color and finish across the entire surface. This creates a seamless blend between the concealed cabinet and the surrounding wall.

Installation Complete

Your in-wall gun cabinet is now installed. Take the time to inspect your work, ensuring everything is secure and level. Remember to follow local building codes and any safety regulations.

Safety and Security

Always prioritize safety and security when handling firearms and installing a concealed in-wall gun cabinet. Remember to:

  • Store your firearms responsibly, following all applicable laws and regulations.
  • Secure the cabinet with a high-quality lock and keep the key in a safe place.
  • Inform household members, particularly children, about the location of the cabinet and the importance of safety.
  • Installing a concealed in-wall gun cabinet requires careful planning, precise execution, and a commitment to safety. Following these steps and adhering to local building codes will help you create a secure and discreet storage solution for your firearms.

    Share:

    How to make a handmade gun cabinet with shelves and drawers

    How to make a handmade gun cabinet with shelves and drawers

    Building a Handmade Gun Cabinet: A Step-by-Step Guide

    Hey there, gun owners! Tired of seeing your firearms crammed into an unsafe, haphazardly assembled mess? Ever wanted a stylish and secure cabinet to house your precious collection? Well, you̢۪ve come to the right place. Building a custom gun cabinet is a satisfying and worthwhile project that will not only enhance your home security but also give you a place to proudly display your firearms. Don̢۪t worry, this isn't some rocket science project, we'll walk you through it step-by-step.

    Planning Your Project

    Before diving headfirst into sawdust and screws, we need to have a plan, right? Think about these key considerations before you even touch your tools:

    Size and Dimensions

    First, let's figure out how much space you've got and how much you need. What size gun cabinet will fit comfortably in your chosen location? How many guns do you want to store? Do you need space for accessories like scopes, ammo, or cleaning supplies?

    Don't forget to factor in the weight of your guns and the extra weight of shelves and drawers. You want your cabinet to be sturdy and safe, so build it with the weight it will have to hold in mind.

    Materials and Style

    What kind of vibe are we going for? A rustic look with reclaimed wood? A sleek modern design with polished steel? Or maybe a classic wood finish with decorative hardware? Your personal style and the overall aesthetics of your home should dictate the materials and finish. Consider using hardwoods like oak, maple, or walnut, but you can also get a great look with pine, cedar, or even plywood. Remember, you can always stain or paint it to match your preferred style.

    Security Features

    This is critical! We're not just building a fancy shelf unit, we̢۪re creating a secure environment for your firearms. Here are some features to think about:

  • Solid Construction: Strong wood and sturdy joinery are a must.
  • Locking Mechanism: A heavy-duty lock with multiple locking points is essential. A deadbolt lock is a great option for added security.
  • Security Hardware: Consider installing a combination lock or an alarm system for extra protection.
  • Tools and Materials

    Here̢۪s a list of tools and materials you'll need, but if you don̢۪t have some of them, maybe you can borrow them or find them at a local lumber yard:

    Tools

  • Circular saw
  • Jig saw
  • Power drill
  • Driver bits
  • Tape measure
  • Level
  • Pencil
  • Safety glasses
  • Clamps
  • Sandpaper
  • Router (optional)
  • Materials

  • Lumber (select your preferred wood type, thickness, and quantity based on your cabinet's design)
  • Plywood (for shelves and drawers)
  • Door hinges
  • Door handles
  • Locking mechanism (deadbolt lock, combination lock, etc.)
  • Drawer slides
  • Wood glue
  • Screws
  • Finish (stain, paint, varnish, etc.)
  • Hardware (hinges, handles, drawer pulls)
  • Building the Cabinet Base

    Let̢۪s get our hands dirty! This is where the real fun begins. We'll start by building a sturdy base for our gun cabinet.

    Cutting and Assembling the Base

    1. Cut the base pieces to size. Remember to consider the thickness of the wood when cutting, you'll want the base to fit snugly and securely. A circular saw and a straight edge will be your best friend here.

    2. Use wood glue to attach the base pieces. Apply a generous amount of glue to each joint, then clamp the pieces together. This will ensure a strong, secure bond.

    3. Once the glue has dried, use wood screws to reinforce the joints. Pre-drill pilot holes to prevent splitting. This is extra security that makes sure your base is super sturdy.

    Adding Sides and Back Panels

    Now let̢۪s build the walls of our cabinet. We̢۪ll be adding the sides and back panels.

    Cutting and Attaching Sides

    1. Cut the side panels to length. They should match the height of the cabinet.

    2. Use wood glue and screws to attach the side panels to the base. Make sure they are plumb and square. Clamps will help hold everything in place while the glue dries.

    Attaching the Back Panel

    1. Cut the back panel to size. It should fit snugly inside the frame of the cabinet.

    2. Attach the back panel to the sides and base. Again, use wood glue and screws for a secure connection. You can choose to attach the back panel flush with the edges or inset it slightly for a cleaner look.

    Creating the Shelves

    Now that we have a solid foundation, we can add some shelves to hold our firearms. This is where you can customize the cabinet to suit your storage needs.

    Cutting and Assembling Shelves

    1. Decide how many shelves you want and what spacing will work best for your guns. Measure carefully and cut the shelves from plywood to the desired length.

    2. You can choose to install the shelves with shelf supports or simply attach them to the sides of the cabinet with screws. If you̢۪re using shelf supports, make sure they are securely attached to the sides.

    Making the Doors

    Time to create the doors! This is where you̢۪ll want to pay attention to the style and look you̢۪re going for.

    Cutting and Shaping the Doors

    1. Cut the door panels to size. They should match the width and height of the cabinet opening. You can also use a router to add decorative details like raised edges or beveled edges. This is a great way to make the cabinet more visually appealing.

    2. If you're using a router, consider using a template to create consistent details. This will ensure a polished and professional look.

    Attaching Hinges and Handles

    1. Install the door hinges. You'll want to position them evenly on the doors and the cabinet sides. Make sure the hinges are screwed in securely.

    2. Once the hinges are in place, attach the door handles. Choose handles that match your cabinet̢۪s style.

    Building the Drawers

    Ready for some extra storage? Let's build a drawer or two to house your cleaning supplies, ammo, or other accessories.

    Cutting and Assembling the Drawer Boxes

    1. Cut the drawer pieces to size. Remember to account for the thickness of the wood and the drawer slides when making your cuts. Use a jigsaw to cut the pieces to their exact shape.

    2. Assemble the drawer boxes. Use wood glue and screws to attach the drawer pieces together. Make sure the corners are square and the drawer glides smoothly.

    Adding Drawer Slides and Hardware

    1. Install the drawer slides. You'll need to attach the slides to both the drawer box and the cabinet. Make sure they are aligned correctly and positioned at the right height for the drawer to slide smoothly.

    2. Attach the drawer pulls. Make sure they are secure and easy to grab.

    Finishing Touches

    Almost there! We̢۪re nearing the end of our project. It's time to add those final touches that will make your handmade gun cabinet look fantastic.

    Sanding and Finishing

    1. Sand the entire cabinet, including the doors, shelves, and drawers. Start with a coarse grit sandpaper and gradually work your way up to a finer grit for a smooth finish. This step will help ensure a uniform finish and highlight the beauty of the wood.

    2. Apply a finish of your choice. You can use stain, paint, or varnish, whatever matches your desired style. Apply the finish evenly and allow it to dry completely. For a durable finish, consider applying multiple coats.

    Installing the Locking Mechanism

    1. Choose a secure locking mechanism that meets your needs. A deadbolt lock or a combination lock can add an extra layer of security.

    2. Install the locking mechanism according to the manufacturer̢۪s instructions. Make sure it is positioned securely and functions properly. Don't forget to test it thoroughly.

    Congratulations! You Did It!

    You've built a beautiful and secure handmade gun cabinet! Pat yourself on the back, because this is a project to be proud of! Remember, safety and security are paramount, so always double-check your work and ensure the cabinet is functioning properly. You've got yourself a fantastic new storage space, and it̢۪s totally personalized to your taste. Happy shooting!

    Share:

    How to build an in-wall gun cabinet with a high-tech locking system

    How to build an in-wall gun cabinet with a high-tech locking system

    Building a High-Tech In-Wall Gun Cabinet: A DIY Guide

    Hey there, gun enthusiasts! Ever dreamt of a sleek, secure way to store your firearms that seamlessly blends into your home décor? Well, you're in luck! This guide will walk you through building a high-tech in-wall gun cabinet, combining the best of functionality and modern security features.

    Planning Your In-Wall Gun Cabinet

    Before you start wielding a hammer and saw, it's vital to plan your project meticulously. Here's what you need to consider:

    1. Location, Location, Location

    Choosing the right spot is key. Consider factors like:

    • Accessibility: Make sure the cabinet is easily accessible for you but out of reach for children and unauthorized individuals.
    • Structural Integrity: The wall you choose should be sturdy enough to support the weight of your cabinet and firearms.
    • Concealment: Pick a spot that blends in with your décor, whether it's behind a picture, a mirror, or a bookshelf.

    2. Size and Dimensions

    Measure the space where you want your cabinet to be and design its dimensions accordingly. Be mindful of the size and number of firearms you need to store.

    3. Material Selection

    The material you choose for your cabinet should be robust, fire-resistant, and aesthetically pleasing. Here are some common options:

    • Steel: Excellent strength and fire resistance. Choose thicker gauge steel for added security.
    • Wood: Can provide a classic look, but ensure you use hardwood or plywood with a fire-resistant finish.
    • Concrete: Highly durable and fire-resistant, but requires specialized tools and knowledge.

    4. Locking System

    This is where the "high-tech" part comes in! Explore various options like:

    • Biometric Locks: Fingerprint or iris scanners offer high security and convenience.
    • Smart Locks: Integrate your cabinet with your smart home system for remote control and access management.
    • Digital Keypads: Use a customizable code for access.
    • Combination Locks: A classic option that requires knowing the right combination to open the cabinet.

    Building Your In-Wall Gun Cabinet

    Now for the fun part - building your secure haven!

    1. Framing and Construction

    This step involves creating the skeleton of your cabinet using materials like wood or metal studs. Remember to consider the weight of the firearms and the locking mechanism when choosing your framing materials.

    2. Installing the Locking System

    This step depends on the type of locking system you've chosen. Carefully follow the manufacturer's instructions for installation.

    3. Finishing Touches

    Now it's time to make your in-wall gun cabinet look its best! Consider these options:

    • Painting or Staining: Choose a color that blends in with your existing décor or adds a personal touch.
    • Adding a False Front: This could be a picture, a mirror, or a bookshelf to further disguise your cabinet.

    Tips for Enhancing Security

    Beyond the basic construction, here are some extra measures to strengthen your in-wall gun cabinet's security:

    • Reinforce the Door: Add extra layers of steel or metal to the door for increased resistance to forced entry.
    • Install Motion Sensors: Trigger an alarm or light when someone approaches the cabinet.
    • Consider a Security System: Integrate your in-wall gun cabinet into your home security system for extra protection.
    • Invest in Quality Firearms Safes: Store your firearms within the cabinet using high-quality safes for added protection.

    Safety Considerations

    Remember, even the most secure in-wall gun cabinet won't do much good if you're not practicing safe firearm storage.

    • Never leave firearms loaded and accessible: Ensure all guns are unloaded and stored separately from ammunition.
    • Use trigger locks or cable locks: These devices prevent accidental discharge.
    • Keep ammunition locked separately: Storing ammunition in a separate, secured location further enhances safety.
    • Store firearms responsibly: Always prioritize safety and follow local laws regarding firearm storage.

    Conclusion

    Building a high-tech in-wall gun cabinet is a rewarding DIY project that combines security, functionality, and style. Remember to carefully plan, choose the right materials and locking systems, and always prioritize safety. With a bit of effort and the right guidance, you can create a discreet and secure haven for your firearms that seamlessly blends into your home.

    So, what are you waiting for? Grab your tools and get building!

    Share:

    Diy handmade gun cabinet: how to make a personalized design

    Diy handmade gun cabinet: how to make a personalized design


    A gun cabinet is more than just a storage unit. It's a safe haven for your firearms, a testament to your responsible ownership, and a reflection of your personal style. Building your own custom gun cabinet offers an unparalleled opportunity to create a piece that perfectly suits your needs and aesthetic preferences. This comprehensive guide will walk you through the design process, empowering you to transform your vision into reality.

    1. Planning and Conceptualization:

    A. Defining Your Requirements:

    Gun Collection Size: Consider the number and types of firearms you intend to store. This dictates the size and internal configuration of your cabinet.
    Security Level: Determine the level of security you desire, whether it be basic protection against casual access or advanced features like biometric locks or reinforced construction.
    Storage Needs: Think about accessories like scopes, magazines, cleaning supplies, and ammunition. Allocate specific spaces for these items within your design.
    Budget: Establish a realistic budget for materials, tools, and potential professional assistance.

    B. Inspiration and Style:

    Research: Explore online resources, woodworking magazines, and local gun shops for inspiration. Look at existing gun cabinets, paying attention to their design elements, materials, and overall aesthetic.
    Style Choices: Decide on a style that complements your home décor. Options include traditional, modern, rustic, or minimalist.
    Personal Touches: Incorporate elements that reflect your interests or hobbies. This could be a wood inlay featuring a favorite hunting scene, a custom door handle with your initials, or a dedicated space for your hunting trophies.

    2. Design and Blueprint:

    A. Sketching and Visualization:

    Hand-Drawn Sketches: Begin by sketching out rough ideas on paper. Experiment with different configurations, dimensions, and features.
    Digital Design Software: Utilize CAD software like SketchUp or Fusion 360 to create detailed 3D models of your cabinet. This allows for precise measurements, visualization of the final product, and easy modification.

    B. Blueprint Creation:

    Detailed Measurements: Carefully measure all components, including the cabinet body, shelves, doors, and any additional features.
    Material Selection: Choose appropriate materials like wood, metal, or a combination of both. Consider the durability, weight, and aesthetic appeal of each material.
    Assembly Plan: Create a detailed assembly plan, outlining the steps for building the cabinet. Include diagrams, cut lists, and instructions for each component.

    3. Construction:

    A. Material Acquisition:

    Lumber: Select high-quality, kiln-dried wood for durability and stability. Consider species like oak, maple, cherry, or walnut for their strength and visual appeal.
    Hardware: Source hinges, latches, locks, handles, and other necessary hardware components. Choose quality pieces that align with your design aesthetic and security needs.
    Tools: Ensure you have the necessary tools, including saws, drills, sanders, clamps, and a router if required.

    B. Building the Cabinet Body:

    Cutting and Joining: Accurately cut the wood components according to your blueprint and join them using mortise and tenon joints, dowels, or pocket screws.
    Reinforcement: For added strength and security, consider reinforcing the cabinet body with metal plates, corner braces, or a solid wood back panel.
    Shelf Installation: Install shelves using brackets, dovetail joints, or other secure methods, ensuring they can support the weight of your firearms and accessories.

    C. Door Construction and Installation:

    Door Design: Create a door design that complements the cabinet style. Consider using traditional panel doors, frame and panel doors, or even sliding doors for a modern touch.
    Hinges and Locks: Install high-quality hinges that can handle the weight of the door and secure locks for added protection.
    Finish: Choose a finish that suits your style, whether it be natural wood, stain, paint, or a combination of these.

    4. Personalization and Finishing Touches:

    A. Custom Details:

    Inlays: Create intricate wood inlays to add visual interest and a touch of artistry.
    Carving: Hand-carve decorative elements on the cabinet body, doors, or shelves, expressing your individual style.
    Engraving: Engrave your initials, a family crest, or a meaningful quote into the wood for a personal touch.

    B. Final Touches:

    Sanding and Finishing: Sand the entire cabinet to a smooth finish, paying attention to any carvings or inlays. Apply your chosen finish for protection and aesthetic appeal.
    Hardware Installation: Install all hardware components, ensuring they are securely fastened and function correctly.
    Clean-Up: Thoroughly clean the cabinet before placing your firearms and accessories.

    5. Considerations and Safety:

    Fire Safety: Ensure your cabinet is placed in a well-ventilated area and away from any heat sources to prevent fire hazards.
    Child Safety: Install child-resistant locks or other safety features to prevent unauthorized access by children.
    Maintenance: Regularly inspect your cabinet for any wear or damage and maintain the finish to keep it looking its best.

    Conclusion:

    Building a custom gun cabinet allows you to create a personalized sanctuary for your firearms, reflecting your individual style and providing a secure and organized storage solution. By carefully planning, designing, and constructing your cabinet, you can transform your vision into a tangible testament to responsible gun ownership. Remember, the key to a successful project lies in attention to detail, quality materials, and a commitment to safety.

    Share:

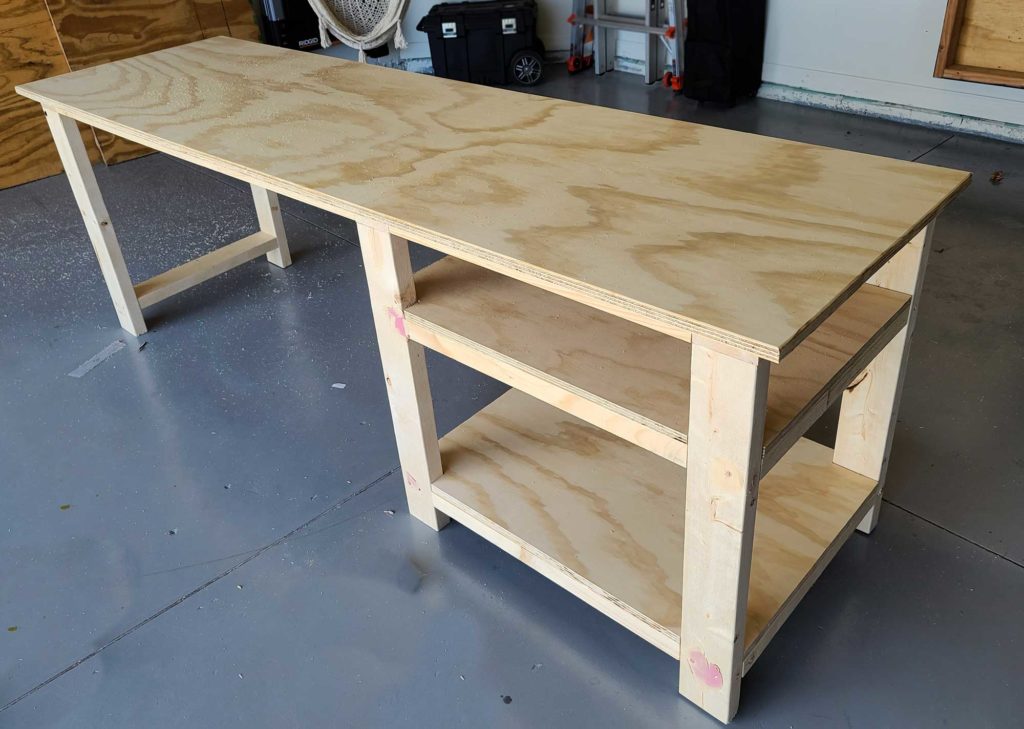
    Step-by-step instructions for making a simple wood desk

    Step-by-step instructions for making a simple wood desk


    The allure of crafting a piece of furniture from scratch is undeniable. It offers a tangible expression of creativity and a sense of accomplishment. This guide will walk you through the construction of a simple yet functional wooden desk, perfect for a home office or study.

    Materials:

    Lumber:
    Top: 2 pieces of 3/4" thick plywood or solid wood (1" x 24" x 48") for the top panels.
    Legs: 4 pieces of 2x4 lumber (8" x 36") for the legs.
    Aprons: 2 pieces of 1x4 lumber (1" x 3 1/2" x 48") for the front and back aprons.
    Rails: 2 pieces of 1x4 lumber (1" x 3 1/2" x 24") for the side rails.
    Fasteners:
    Wood screws: 2" and 1 1/4" screws (at least 50 each) for assembling the frame.
    Wood glue: For strengthening the joints.
    Finishing Supplies:
    Wood filler: To fill any gaps or imperfections.
    Sandpaper: 80 grit, 120 grit, and 220 grit for smoothing surfaces.
    Wood stain or paint: Your choice of finish (optional).
    Polyurethane or varnish: For a protective coating (optional).
    Tools:
    Tape measure: For accurate measurements.
    Pencil: For marking wood.
    Saw: Circular saw or handsaw for cutting lumber to size.
    Drill: With various drill bits for pilot holes and countersinking.
    Screwdriver: For securing screws.
    Clamps: To hold pieces together while gluing.
    Level: To ensure even placement of the legs.
    Safety glasses: Protect your eyes.
    Dust mask: To prevent inhaling sawdust.
    Work gloves: For better grip and protection.

    Step 1: Planning and Preparing

    1. Design: Decide on the dimensions of your desk. Consider the space you have available and the intended use of the desk. This guide uses standard dimensions for a basic desk, but feel free to adjust based on your needs.

    2. Cutting Lumber: Carefully cut all lumber to the specified sizes. Ensure your cuts are precise and straight for a sturdy and aesthetically pleasing desk. Use a saw guide for added precision.

    3. Sanding: Smooth the edges and surfaces of the wood pieces using 80-grit sandpaper. This step removes rough edges and prepares the wood for finishing.

    Step 2: Assembling the Frame

    1. Legs and Aprons: Attach the legs to the aprons using 2" wood screws. Drill pilot holes slightly smaller than the screw diameter to prevent splitting the wood. Countersink the screws for a flush finish. Use wood glue for added strength.

    2. Rails: Attach the rails to the aprons using 1 1/4" wood screws. Ensure the rails are parallel and flush with the aprons. Use wood glue for added strength.

    3. Strengthening the Frame: After glue has dried, reinforce the frame by adding additional screws through the legs and aprons into the rails. This creates a more robust and stable base for the desk top.

    Step 3: Creating the Desk Top

    1. Joining the Panels: If using plywood, the two panels can be joined with a simple butt joint. For solid wood, consider a more complex joint like a miter or a lap joint for added strength and stability.

    2. Fastening the Panels: Secure the top panels to the frame using screws or specialized desk top fasteners. Countersink the screws for a flush finish. Wood glue can also be used.

    Step 4: Finishing Touches

    1. Filling Gaps: Fill any gaps or imperfections with wood filler. Allow the filler to dry completely.

    2. Sanding: Sand the entire desk surface smoothly using 120-grit and then 220-grit sandpaper. Pay attention to corners and edges.

    3. Finishing: Apply your chosen wood stain or paint. Allow the finish to dry completely. For added protection, apply a layer of polyurethane or varnish.

    Step 5: Enjoy Your New Desk

    1. Positioning and Leveling: Place the desk in its desired location and use a level to ensure all legs are even. Adjust the legs as needed for stability.

    2. Decorating: Personalize your new desk with accessories, a lamp, and your favorite office supplies.

    Safety Tips

    Always wear safety glasses and a dust mask when using power tools.
    Use clamps to secure workpieces while drilling or screwing.
    Avoid distractions and maintain a clean workspace.

    Tips for a Successful Project

    Plan Ahead: Carefully plan your design and measure twice before cutting.
    Quality Materials: Use high-quality lumber and fasteners for a sturdy and long-lasting desk.
    Dry Fit: Assemble the frame without glue to ensure proper alignment before using glue.
    Finish Carefully: Take your time with the finishing process for a professional look.

    Conclusion

    Building a simple wooden desk is a rewarding experience that allows you to craft a functional and personalized piece of furniture. By carefully following these steps, you can create a desk that will serve you well for years to come. Remember to enjoy the process, take your time, and be proud of your accomplishment.

    Share:

    Popular Posts

    Powered by Blogger.

    Labels

    Pages