Rocking Chair Woodworking Plans: Comfortable and Classic Design

Rocking Chair Woodworking Plans: Comfortable and Classic Design

This comprehensive guide provides detailed woodworking plans for constructing a comfortable and classic rocking chair. The design emphasizes both ergonomic comfort and enduring aesthetic appeal, suitable for experienced woodworkers seeking a challenging yet rewarding project. These plans offer meticulous instructions, detailed diagrams, and crucial considerations for material selection and finishing, ensuring a high-quality, long-lasting rocking chair.

I. Design Overview and Material Selection

The rocking chair design presented here incorporates classic elements of Shaker and Mission styles, focusing on clean lines, simple joinery, and the use of durable hardwood. The overall dimensions are optimized for comfortable seating and balanced rocking motion. The design prioritizes strength and stability while minimizing unnecessary ornamentation.

A. Dimensions and Specifications

The following dimensions provide a starting point. Adjustments can be made based on individual preferences and available materials. All dimensions are in inches unless otherwise specified:

  • Seat Height: 18"
  • Seat Width: 20"
  • Seat Depth: 18"
  • Overall Height: 40"
  • Rocker Length: 36"
  • Rocker Width: 6"
  • Back Height: 30"
  • Armrest Height: 26"
  • Armrest Width: 2"

Detailed diagrams with precise measurements are provided in the accompanying plan set (not included in this textual description). These diagrams will show the exact dimensions of each component and the angles involved in constructing the rockers and back supports.

B. Material Selection: The Foundation of Quality

The choice of wood significantly impacts the chair's durability, aesthetic appeal, and overall feel. Hardwoods are strongly recommended for their strength and resistance to wear. Suitable options include:

  • Oak: Offers exceptional strength and a beautiful grain pattern. Red oak and white oak are both excellent choices.
  • Maple: Provides a smooth, hard surface and a refined look. Hard maple is particularly durable.
  • Cherry: A luxurious hardwood with rich color and a fine texture. It requires careful finishing to maintain its beauty.
  • Walnut: A dark, elegant wood with striking grain patterns. It's more expensive but offers exceptional aesthetic appeal.

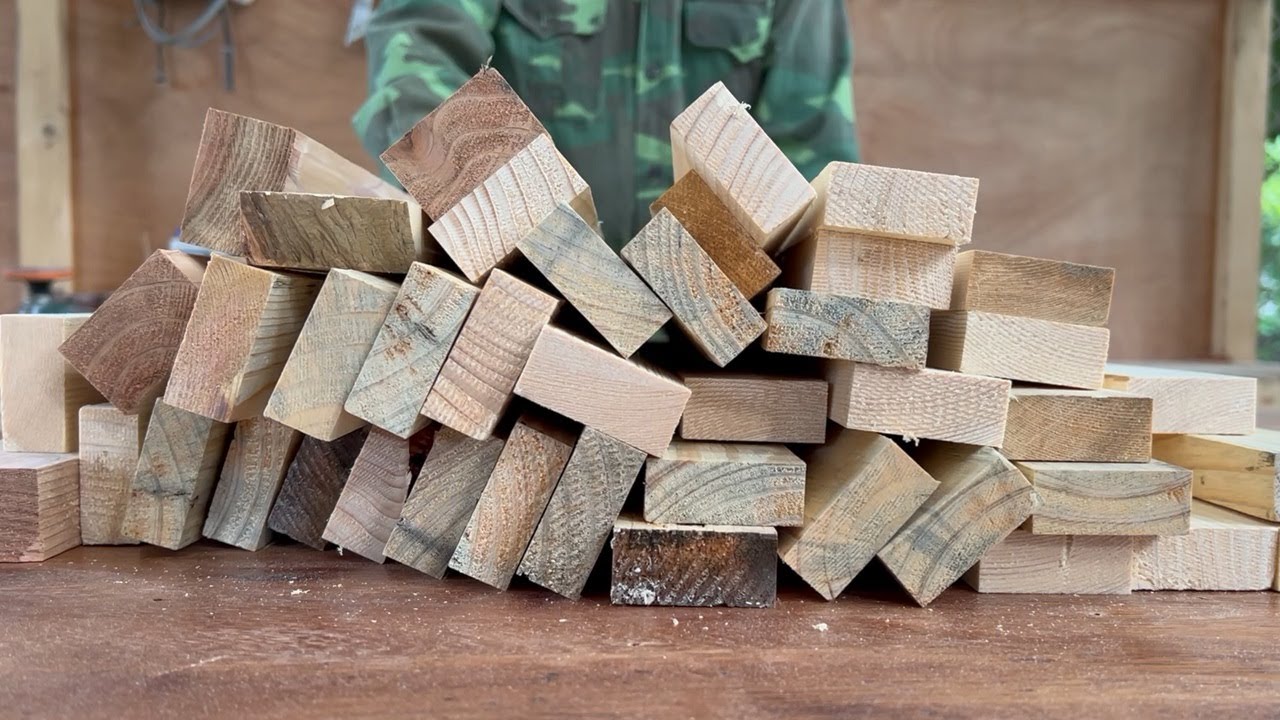
Select lumber that is properly seasoned (dried to a moisture content of approximately 8-12%) to minimize warping and cracking. Ensure the wood is free from significant knots, splits, or other defects that could compromise the chair's structural integrity. Consider purchasing lumber that is already planed and surfaced to simplify the construction process.

II. Construction Process: A Step-by-Step Guide

The construction process involves several key steps, beginning with preparing the lumber and progressing to assembling the chair's components. Precision and accuracy are crucial throughout this phase.

A. Preparing the Lumber

Before starting assembly, carefully review the detailed diagrams to understand the dimensions and cuts required for each component. Use a sharp saw to make accurate cuts, ensuring squareness and avoiding any chipping or damage to the wood. A planer, jointer, and hand tools will prove invaluable in refining the lumber to the specified dimensions.

B. Constructing the Rockers

The rockers form the foundation of the rocking motion. Accurately cutting the curved shape and ensuring precise angles are crucial for smooth, stable rocking. Templates (included in the full plan set) will greatly assist in creating identical rockers. The rockers should be carefully joined to the chair's base using robust joinery techniques, such as mortise and tenon joints, to prevent movement and breakage.

C. Assembling the Seat and Backrest

The seat and backrest are connected to the rockers and the chair's frame using a combination of techniques—often a combination of mortise and tenon, dowels, and screws. Pre-drilling pilot holes for screws will prevent wood splitting. Ensure that the seat is securely attached and offers comfortable support. The backrest should be angled for comfortable posture, allowing for proper back support without hindering rocking motion.

D. Attaching the Armrests

The armrests are attached to the sides of the chair. Their height and width should be comfortable. The joinery should be strong enough to withstand stress during use. Ensure the armrests are securely attached to both the seat and the chair's frame using strong joinery and appropriate fasteners.

III. Finishing Touches: Enhancing Aesthetics and Durability

Proper finishing protects the wood, enhances its appearance, and contributes to the chair's longevity.

A. Sanding and Preparation

Thorough sanding is crucial for a smooth, even finish. Start with coarser grit sandpaper (80-100 grit) to remove any imperfections, gradually progressing to finer grits (150-220 grit) for a fine, polished surface. Sanding in the direction of the wood grain is recommended to prevent scratches.

B. Applying the Finish

Several finishes are suitable for a rocking chair, including:

  • Polyurethane: Provides a durable, water-resistant finish. Apply multiple thin coats, allowing each to dry completely before applying the next.
  • Lacquer: Offers a hard, durable surface with a clear or colored finish. It dries quickly, but requires careful application to avoid runs or drips.
  • Oil-based finishes (Tung oil, linseed oil): Offer a more natural look and feel, penetrating the wood to enhance its color and protect it from moisture. These require more frequent reapplication.

Follow the manufacturer's instructions for each finish. Ensure proper ventilation when applying finishes, as many contain volatile organic compounds (VOCs).

C. Final Inspection

Once the finish has fully cured, carefully inspect the chair for any imperfections or areas requiring additional attention. A final light sanding and touch-up of the finish might be necessary.

IV. Safety Precautions

Woodworking involves inherent risks. Always use appropriate safety equipment, including:

  • Safety Glasses: To protect your eyes from flying debris.
  • Dust Mask: To prevent inhaling wood dust.
  • Hearing Protection: To reduce noise exposure from power tools.
  • Gloves: To protect your hands.

Follow all safety guidelines for each power tool used. Never operate machinery while fatigued or under the influence of drugs or alcohol. Work in a well-lit, organized workspace to minimize risks.

By following these detailed plans and safety precautions, you can create a beautiful and comfortable rocking chair that will provide years of enjoyment. Remember that precision and attention to detail are key to a successful outcome. This detailed guide provides a foundational understanding; the complete plan set (sold separately) contains detailed diagrams and further specifications necessary for successful chair construction.

Share:

Woodworking Plans for a Beautiful Outdoor Rocking Chair

Build Your Dream Outdoor Rocking Chair: A Detailed Guide

Hey there, fellow woodworking enthusiasts! So you're looking to build a rocking chair? Fantastic! There's something incredibly satisfying about crafting something beautiful and functional with your own two hands, especially something as classic and comforting as a rocking chair. This guide will walk you through building a beautiful, sturdy outdoor rocking chair that you'll be proud to show off on your porch. We're going to keep it conversational, so grab your coffee (or tea!), settle in, and let's get started!

Choosing Your Wood and Materials

The first step in any woodworking project is choosing the right materials. For an outdoor rocking chair, durability is key. You want something that can withstand the elements – rain, sun, snow – without warping or rotting. Here are some excellent choices:

  • Cedar: Naturally resistant to rot and insects, cedar is a popular choice for outdoor furniture. It's also relatively lightweight and easy to work with.
  • Redwood: Similar to cedar in its durability and resistance to the elements, redwood offers a beautiful reddish hue.
  • Pressure-Treated Pine: A more affordable option, pressure-treated pine is treated with chemicals to protect it from rot and insects. Just be mindful of the chemicals used and ensure they're safe for outdoor use and won't leach into your skin.
  • Ipe (Brazilian Walnut): If you're looking for the ultimate in durability and weather resistance, Ipe is a fantastic choice, though it's significantly more expensive than other options.

Beyond the wood itself, you'll also need:

  • Wood glue: A high-quality exterior-grade wood glue is essential for strong joints.
  • Wood screws: Choose exterior-grade screws in a size appropriate for your chosen wood.
  • Finishing materials: You'll need something to protect your chair from the elements. Options include exterior-grade paint, stain, or varnish. I personally love a good natural stain to let the beauty of the wood shine through.
  • Sandpaper: Various grits for smoothing the wood throughout the process.
  • Clamps: Essential for holding pieces together while the glue dries.
  • Safety glasses and hearing protection: Always prioritize safety when working with power tools!

Detailed Construction Plans: Let's Get Building!

This plan provides a basic framework. Feel free to adapt it to your own style and preferences – maybe you want wider arms or a higher back. Remember to always double-check your measurements!

Step 1: Cutting the Wood

Based on your chosen design (you can find numerous free rocking chair plans online!), cut all your pieces to the specified lengths. Accuracy is crucial here, so take your time and use sharp tools. A miter saw is highly recommended for clean, precise cuts. Always measure twice, cut once!

Step 2: Assembling the Seat

This typically involves joining several boards to create a sturdy seat. Use wood glue and screws to secure the joints. Make sure your seat is perfectly square and level before moving on.

Step 3: Constructing the Backrest

The backrest is usually made of curved pieces of wood, often steamed and bent to achieve the desired shape. If you're tackling a more complex curve, you might want to consider using a steam box to bend your wood. However, simpler designs can be made by using multiple shorter pieces joined together.

Step 4: Building the Arms

The arms connect the seat and backrest. Carefully measure and cut the pieces, ensuring they're securely attached and comfortable to rest on. I like to slightly curve the armrests for added comfort.

Step 5: Creating the Rockers

This is arguably the most important part! The rockers determine the rocking motion. You'll need to carefully shape the rockers to ensure a smooth and comfortable rocking experience. Templates or pre-cut rocker kits can make this step easier, but if you are more confident in your woodworking abilities, you can create these yourself. Remember that the angle of the rockers will determine the intensity of the rocking motion. Too steep and you'll be rocking like a pendulum. Too shallow and it'll feel clunky.

Step 6: Attaching the Rockers

Once the rockers are shaped, securely attach them to the base of the chair using robust wood glue and screws. Double-check the alignment to ensure a balanced rocking motion.

Step 7: Sanding and Finishing

After all the pieces are assembled, thoroughly sand the entire chair. Start with coarser grit sandpaper and gradually move to finer grits for a smooth finish. This step is crucial for both the appearance and the longevity of your chair. Then apply your chosen finish – whether it's paint, stain, or varnish – following the manufacturer's instructions carefully.

Tips for Success

Here are a few extra tips to help you along the way:

  • Take your time: Rushing the process can lead to mistakes. Work slowly and deliberately.
  • Use the right tools: Investing in good quality tools will make the process much easier and more accurate.
  • Check your measurements frequently: Double-checking your measurements at every stage will prevent errors down the line.
  • Ask for help: If you're struggling with a particular step, don't hesitate to ask for help from a more experienced woodworker.
  • Have fun!: Remember to enjoy the process! Building something with your own hands is a rewarding experience.

Commonly Asked Questions

Q: What type of wood glue is best for outdoor furniture?

A: Use a high-quality exterior-grade wood glue specifically designed for outdoor use. Look for ones labeled as waterproof or weather-resistant.

Q: How do I prevent my rocking chair from warping?

A: Choose a wood known for its stability and weather resistance. Properly acclimate your lumber before use, allowing it to adjust to the humidity in your workshop. Ensure all joints are well-glued and screwed for strength.

Q: How long does it take to build a rocking chair?

A: The time it takes will vary depending on your experience level and the complexity of the design. Expect to spend anywhere from a weekend to several weeks, depending on how much time you can dedicate to it each day.

Q: Can I use pre-cut kits?

A: Absolutely! Pre-cut kits can make the process significantly easier, especially for beginners. Many online retailers sell rocking chair kits with all the pieces pre-cut and instructions included.

Q: What's the best finish for an outdoor rocking chair?

A: There are many options, including exterior-grade paints, stains, and varnishes. Consider the look you want to achieve, as well as the level of protection you need. Marine varnish is a very durable option.

There you have it! I hope this guide has inspired you to start building your own beautiful outdoor rocking chair. Remember, it's a journey, and the pride you'll feel when it's finished will be well worth the effort. Happy woodworking!

Share:

Aquarium Furniture Plans for Crafting Unique, Personalized Tank Stands

Dive In: Crafting Your Dream Aquarium Furniture

So, you've got a gorgeous aquarium, maybe even a whole reef tank, and you're staring at that flimsy, off-the-shelf stand, feeling...underwhelmed? You're not alone! Many aquarium enthusiasts crave a more personalized, stylish, and often more robust stand than what's typically available in pet stores. Building your own aquarium furniture is a rewarding project that lets you perfectly match your tank's size, style, and your own personal aesthetic. Let's dive into the world of DIY aquarium furniture plans and unleash your inner craftsman (or craftswoman!).

Planning Your Perfect Aquarium Stand

Before you even think about grabbing a saw, careful planning is key. This isn't just about aesthetics; the structural integrity of your stand is paramount. A collapsed stand is a disaster waiting to happen (and a very expensive one at that!).

1. Measuring Your Aquarium: The Foundation of Success

Grab your measuring tape and get accurate dimensions of your aquarium. Note the tank's length, width, and especially its height. You'll need to add height for the stand itself – a minimum of 6 inches is recommended to provide sufficient clearance for equipment like filters and heaters. Remember, the total weight of your full aquarium is considerable, so we'll talk about weight distribution and reinforcement throughout this process.

2. Choosing Your Materials: Strength and Style

The type of wood you select significantly impacts the strength and longevity of your stand. Pressure-treated lumber is a definite no-go due to the chemicals leaching into the water. Instead, consider:

  • Hardwoods like oak or maple: These are strong, durable, and beautiful, although they can be more expensive.
  • Softwoods like pine or fir: More affordable, but require careful planning and potentially extra bracing to handle the weight.
  • Plywood: Offers a good strength-to-weight ratio and is a versatile option. Choose exterior-grade plywood for better moisture resistance.

Consider also what kind of finish you want. A simple stain and sealant are classic choices. You might even want to paint it to match your décor!

3. Sketching Your Design: Visualizing Your Creation

Now for the fun part: sketching! Don't worry about being a professional artist. A simple sketch showing the dimensions and basic structure is enough. Consider these factors:

  • Open or closed shelving? Do you want open access to your equipment or a more closed, finished look?
  • Cabinet doors? These add a polished touch and can hide unsightly equipment.
  • Drawers? For storing fish food, nets, and other supplies.
  • Extra bracing? Crucial for heavier tanks. We'll discuss this more later.

Building Your Aquarium Stand: A Step-by-Step Guide

This section can't provide a precise, universally applicable guide, as designs vary widely, but let's outline the general process:

1. Cutting the Wood: Precision is Paramount

Use accurate measurements from your plans and a good quality saw (circular saw, miter saw, or even a hand saw for smaller projects) to cut your lumber to size. Remember to account for any joinery methods (like dadoes, rabbets, or mortise and tenon joints – which add strength but require more skill).

2. Assembling the Frame: The Backbone of Your Stand

This is where your joinery skills come into play. Regardless of your chosen method, ensure all joints are tight and secure. Wood glue and screws are usually sufficient, but you might consider adding dowels or biscuits for added strength, especially for larger tanks. Ensure the frame is perfectly square, using a speed square to check diagonals.

3. Adding Shelving and Supports: Creating Structure

Install your shelves using appropriate supports. Again, the weight of your aquarium is crucial here. Consider using multiple supports under larger shelves. For truly heavy tanks, you might need to create a separate platform within the stand's frame for extra weight distribution.

4. Adding Finishing Touches: Aesthetics and Functionality

Once the structure is complete, you can add cabinet doors, drawers, and any other features you planned. Then it's time for sanding, finishing, and sealing the wood. This protects the wood from moisture and adds to its overall appearance.

5. Reinforcement: Don't Skimp on Safety

For tanks larger than 50 gallons, extra bracing is highly recommended. Consider adding cross-bracing within the frame, and perhaps even using thicker lumber than initially planned. Remember, you're supporting a heavy, water-filled container that can easily crack or even collapse if the stand isn't strong enough.

Safety First: Essential Considerations

Before placing your aquarium on the finished stand, double-check the following:

  • Sturdiness: Give the stand a good shake. It shouldn't wobble or feel unstable.
  • Levelness: Use a level to make sure the stand is perfectly level before placing the tank. Shimming can correct minor imperfections.
  • Weight Distribution: Ensure the weight of the aquarium is evenly distributed across the entire stand.

Commonly Asked Questions

  • Q: What's the best wood for an aquarium stand? A: Hardwoods like oak or maple are ideal for strength and durability, but plywood is a good, more affordable alternative. Avoid pressure-treated lumber.
  • Q: How much weight can a DIY stand hold? A: This depends on the wood type, construction, and bracing. Larger tanks require stronger, more robust designs.
  • Q: Do I need to seal the wood? A: Yes, sealing the wood is crucial to protect it from moisture damage. Use a high-quality sealant designed for interior use.
  • Q: Can I build a stand for a 100-gallon tank? A: Yes, but you'll need a very sturdy design with significant bracing. Consider using thicker lumber and consulting more detailed plans.
  • Q: Where can I find plans? A: There are many online resources, including websites and forums dedicated to DIY aquarium projects. You can also adapt existing furniture plans by scaling them appropriately.

Building your own aquarium furniture is a challenging but rewarding project. By carefully planning, choosing appropriate materials, and following safety guidelines, you can create a beautiful and functional piece that perfectly complements your aquarium and showcases your skills. So grab your tools and start creating your underwater masterpiece's perfect home!

Share:

Elegant Pergola Plans for Creating a Serene Outdoor Space

Elegant Pergola Plans for Creating a Serene Outdoor Space

Transform your backyard into a tranquil oasis with a beautifully crafted pergola. More than just a pretty addition, a pergola offers shade, defines space, and adds architectural interest to your outdoor living area. This guide provides elegant pergola plans, guiding you through design considerations and construction techniques to create a serene and stylish escape.

Designing Your Dream Pergola: Size, Style, and Materials

Before breaking ground, carefully consider the size and style of your pergola to perfectly complement your home and garden. Measure your space accurately to determine the ideal dimensions for your structure. Will it be a small, intimate seating area or a larger entertainment space? Think about the surrounding landscape and how the pergola will interact with existing features like trees, patios, or walkways. Choose a style that reflects your personal aesthetic. Classic designs often feature square or rectangular structures with simple, clean lines. More ornate styles might incorporate intricate latticework, curved beams, or decorative brackets. Explore various materials; the sturdy strength of cedar or redwood offers natural beauty and weather resistance, while pressure-treated lumber provides a more budget-friendly option. Metal pergolas, often steel or aluminum, offer modern aesthetics and low maintenance. Consider how the material will complement your home's existing architecture and the overall style of your garden.

Choosing the Perfect Location

The placement of your pergola significantly impacts its functionality and aesthetic appeal. Prioritize optimal sunlight and shade. Consider the sun's path throughout the day to ensure adequate shade during peak hours, while also allowing sufficient sunlight to enjoy the space. Think about proximity to existing structures – how will it connect to your house, patio, or other outdoor features? Ensure you have sufficient space for comfortable movement around the pergola, leaving enough room for furniture placement and easy access.

Construction Techniques and Essential Steps

Constructing a pergola involves several key steps that require careful planning and execution. Begin by preparing a solid foundation. This is crucial for stability and longevity. Concrete footings are the most robust option, providing a secure base for the posts. Alternatively, you can use pressure-treated lumber for less permanent options. Once the foundation is set, erect the posts, ensuring they are plumb and level. This involves precise measurements and securing the posts with concrete or other suitable anchoring methods. Next, connect the beams, forming the pergola's framework. Use strong fasteners, ensuring the structure is robust and resistant to weather conditions. Finally, add the lattice or roof covering, offering shade and enhancing the pergola's aesthetic appeal. Remember to always prioritize safety, using proper safety equipment and following all building codes.

Adding Personal Touches: Plants, Lighting, and More

Once the structure is complete, personalize your pergola to create a truly unique outdoor haven. Climbing plants, such as ivy, jasmine, or wisteria, add a touch of natural beauty, creating a verdant canopy. Strategically placed lighting fixtures enhance the ambiance, transforming your pergola into a magical space for evening gatherings. Consider adding comfortable seating, such as hanging chairs or a stylish outdoor sofa, along with decorative elements that reflect your personal taste. Perhaps a water feature or a small fire pit will complete your tranquil outdoor space.

Maintaining Your Elegant Pergola

Regular maintenance is essential to preserve the beauty and longevity of your pergola. Inspect the structure regularly, looking for loose connections, damaged wood, or signs of pest infestation. Clean the pergola periodically, removing dirt, debris, and leaves. Depending on the material, apply a protective sealant or stain to protect the wood from the elements and prevent deterioration. By following a simple maintenance routine, you can enjoy your beautiful pergola for years to come.

With careful planning and attention to detail, you can craft an elegant and functional pergola that elevates your outdoor living space. Follow these plans and enjoy the serene escape you've created!

Share:

Beginner Furniture Plans for Simple DIY Creations

Beginner Furniture Plans for Simple DIY Creations

Stepping into the world of DIY furniture can feel daunting, but it doesn't have to be! With a few simple plans and some basic tools, you can craft beautiful, functional pieces that add personality and charm to your home. This guide provides beginner-friendly projects that will boost your confidence and leave you eager to tackle more ambitious creations.

Building a Simple Coffee Table

A coffee table is a foundational piece of furniture, and building one yourself is a fantastic entry point into the world of DIY. This project focuses on a minimalist design, emphasizing clean lines and easy construction. You'll need basic woodworking skills, common tools like a saw, drill, and sander, and readily available materials such as plywood or reclaimed wood for the tabletop and sturdy legs. The process involves cutting the wood to size, assembling the legs (perhaps using pre-made brackets for simplicity), and securely attaching the tabletop. Sanding the edges smooth and applying a protective finish, like a stain or varnish, completes the project, leaving you with a stylish and practical coffee table crafted entirely by you!

Materials List:

  • Plywood or reclaimed wood for the tabletop (size depends on your preference)
  • Four sturdy legs (pre-made legs simplify this step)
  • Wood glue
  • Wood screws
  • Sandpaper (various grits)
  • Wood stain or varnish
  • Measuring tape
  • Saw
  • Drill
  • Screwdriver

Crafting a Rustic Shelf

Rustic shelves offer a blend of functionality and aesthetic appeal. These are incredibly versatile, fitting seamlessly into various room styles and serving as display spaces or extra storage. For a beginner, a simple floating shelf is a great project. This involves choosing your wood – reclaimed wood adds a unique touch – cutting it to your desired length and width, sanding it smooth, and attaching sturdy shelf brackets to the wall. Remember to always use appropriate wall anchors to ensure the shelf's stability and safety. Once installed, you can add your favorite decorative items, displaying plants, books, or cherished mementos. The sense of accomplishment from creating this functional and aesthetically pleasing piece is immensely rewarding!

Tips for Success:

  • Measure twice, cut once: Accuracy is key to ensuring a well-fitted shelf.
  • Use appropriate wall anchors: This guarantees the shelf's secure attachment.
  • Sand thoroughly: Smooth surfaces prevent splinters and create a professional finish.

Building a Headboard for Your Bed

Transform your bedroom with a custom-built headboard. This project is surprisingly straightforward, especially if you opt for a simple design. You can utilize reclaimed wood planks for a rustic look or choose plywood for a more modern aesthetic. The process involves cutting the wood to your desired size and shape. You might want to add decorative elements like molding or paint. Securely attach it to your bed frame (ensure you understand your bed frame's structure beforehand). Adding padding and fabric (optional) will elevate the comfort and visual appeal. The result: a unique headboard that perfectly complements your bedroom's style and reflects your personal touch!

Remember the Fundamentals

Before embarking on any project, gather all necessary tools and materials. Carefully read instructions and take your time, focusing on accuracy and safety. Don't be afraid to ask for help or seek advice online – numerous resources are available to guide you. Most importantly, enjoy the process! Building your own furniture is a rewarding experience that combines creativity, skill development, and a deep sense of satisfaction.

Share:

Space-Saving Woodworking Plans for Wall-Mounted Storage

Space-Saving Woodworking Plans for Wall-Mounted Storage

Maximizing storage in limited spaces is a common challenge, particularly in smaller homes or apartments. Traditional storage solutions often occupy valuable floor space, leaving rooms feeling cramped and cluttered. Wall-mounted storage, however, presents an elegant and efficient solution, providing ample storage capacity without compromising floor area. This comprehensive guide explores various space-saving woodworking plans for wall-mounted storage, catering to diverse needs and skill levels.

Designing for Efficiency: Considering Space and Functionality

Before embarking on any woodworking project, careful planning is paramount. Effective wall-mounted storage begins with a thorough assessment of the available space and the intended functionality. Consider the following:

Assessing Available Wall Space

Measure the wall space precisely, noting any obstructions such as windows, doors, electrical outlets, or heating vents. Sketch a detailed diagram of the wall, indicating the dimensions and locations of these features. This will help you determine the optimal size and placement of your storage units. Consider the load-bearing capacity of the wall—some walls may not support heavier storage units.

Defining Storage Needs

What will you store in these units? Different items require different storage solutions. For example, books require vertical shelving, while tools might necessitate drawers or specialized compartments. Consider the size and weight of the items to be stored, ensuring the design can accommodate them safely and efficiently. A detailed inventory of items will help optimize shelf and compartment sizing.

Choosing the Right Materials

The choice of wood significantly impacts the durability, aesthetic appeal, and cost of your project. Pine is a popular choice for its affordability and workability, while hardwoods such as oak or maple offer superior strength and longevity but come at a higher price point. Consider the intended use and the environment (e.g., humidity levels) when selecting your wood. For example, using plywood in humid areas can cause warping if not properly treated.

Planning for Accessibility

Ensure your wall-mounted storage units are easily accessible. Shelves should be positioned at comfortable heights, and drawers should operate smoothly. Consider adding features like pull-out shelves or trays for items stored at less accessible heights. Avoid designs that create unnecessary obstacles or limit access to other areas of the room.

Practical Woodworking Plans: Step-by-Step Guides

This section outlines several practical woodworking plans for different types of wall-mounted storage, catering to a variety of skill levels and storage needs.

Floating Shelves: A Beginner-Friendly Project

Floating shelves are an excellent entry-level project, requiring minimal woodworking skills. They provide a simple and elegant way to add storage while maintaining a clean, modern aesthetic. The construction generally involves cutting the shelves to the desired dimensions, sanding them smooth, applying a finish (such as paint or stain), and then attaching hidden brackets to the wall and the shelf itself. Detailed plans can be readily found online, offering step-by-step instructions and diagrams.

Materials typically needed: Wood planks, hidden shelf brackets, screws, sandpaper, wood finish, measuring tape, level.

Wall-Mounted Cubby System: Medium Skill Level

A wall-mounted cubby system offers greater storage capacity compared to simple floating shelves. This project involves constructing a series of interconnected cubbies, creating customizable compartments for various items. The complexity increases as the number of cubbies and the intricate detailing grows. This often requires joinery skills, such as rabbet joints or dadoes, for a more robust and aesthetically pleasing outcome.

Materials typically needed: Wood planks, screws, wood glue, clamps, sandpaper, wood finish, measuring tape, level, possibly a router and bits depending on joint type.

Customizable Drawer Units: Advanced Woodworking Project

Building a wall-mounted drawer unit presents a more challenging project requiring advanced woodworking skills. This necessitates creating drawers with precise dimensions and ensuring smooth operation of drawer slides. Dovetail joints, while time-consuming, contribute to a highly durable and aesthetically pleasing result. Consider using high-quality drawer slides for smooth, reliable operation.

Materials typically needed: Wood planks, drawer slides, screws, wood glue, clamps, sandpaper, wood finish, measuring tape, level, possibly a router and various bits for advanced joinery.

Safety Considerations and Best Practices

Safety should always be a paramount concern when undertaking any woodworking project. The following best practices should be adhered to:

  • Always wear appropriate safety gear, including eye protection, hearing protection, and a dust mask.
  • Use sharp tools and maintain them properly. Dull tools increase the risk of injury.
  • Ensure proper ventilation in your workspace to minimize exposure to wood dust and fumes.
  • Securely fasten all wall-mounted units to the wall studs to ensure stability and prevent accidents.
  • Follow the manufacturer's instructions for all tools and materials used.
  • Take breaks and avoid working when fatigued. Fatigue increases the risk of accidents.
  • Consult a structural engineer if you have concerns about the load-bearing capacity of your walls.

Conclusion: Transforming Space with Creative Storage Solutions

Wall-mounted storage offers a powerful solution for maximizing space and enhancing the functionality of any room. By carefully planning your design, selecting appropriate materials, and adhering to safety guidelines, you can create custom storage solutions that meet your individual needs and aesthetic preferences. Remember to consider your skill level and choose a project that aligns with your abilities. With careful planning and execution, you can transform unused wall space into valuable storage, creating a more organized and efficient living environment.

Share:

How to Make a Personalized Wooden Cutting Board with Custom Engraving for Gifts

Craft the Perfect Gift: A Personalized Engraved Wooden Cutting Board

Searching for a truly unique and heartfelt gift? Look no further than a personalized wooden cutting board! These practical and beautiful gifts become cherished heirlooms, showcasing your thoughtfulness and creativity. This guide walks you through the process of creating a custom engraved cutting board, from material selection to the final polish, ensuring your gift leaves a lasting impression.

Choosing Your Cutting Board Canvas

The foundation of your masterpiece lies in choosing the right wood. Consider factors like durability, aesthetics, and the intended use. Hardwoods like maple, cherry, or walnut offer superior resistance to knife marks and boast stunning grain patterns. Maple provides a bright, clean look, while cherry offers rich reddish-brown tones that deepen with age. Walnut, with its dark, elegant grain, adds a touch of sophistication. Softer woods like pine or basswood are easier to engrave but might show more wear and tear over time. Think about the recipient's cooking style and personal preferences when making your selection. Do they prefer a rustic look or something more modern and sleek?

Selecting Your Wood Type:

  • Hardwoods (Maple, Cherry, Walnut): Durable, beautiful grain, resists knife marks.
  • Softwoods (Pine, Basswood): Easier to engrave, but less durable.
  • Exotic Woods (Bamboo, Acacia): Unique look, often more expensive.

Preparing the Cutting Board for Engraving

Before you unleash your creativity with the engraving, ensure your wooden cutting board is ready. Start by sanding the surface smooth. Use progressively finer grit sandpaper, starting with a coarser grit (around 80-100) to remove any imperfections, and gradually moving to finer grits (up to 220) for a silky-smooth finish. This meticulous sanding is crucial for crisp, clean engraving. After sanding, wipe the board clean with a tack cloth to remove any dust particles. This dust-free surface will ensure your engraving is precise and free of blemishes. Applying a food-safe mineral oil or cutting board conditioner enhances the wood̢۪s natural beauty, protects it from moisture, and makes it more resistant to stains. Remember to let the oil soak in completely before proceeding with the engraving.

Personalizing Your Cutting Board with Engraving

Now comes the exciting part â€" the personalization! You have several options for engraving. Professional engraving services offer precision and a wide array of fonts and designs. They can handle complex imagery and intricate details. Alternatively, you can explore DIY engraving techniques. Router bits with engraving attachments can be used for detailed designs, while simpler designs can be achieved with hand-held engravers. Regardless of the method you choose, carefully plan your design. Consider the recipient's name, initials, a special date, a short quote, or a meaningful symbol. Ensure the text is legible and the design complements the shape and size of the cutting board. A clean, simple design often makes the most impactful statement.

Choosing Your Engraving Method:

  • Professional Engraving Services: Precise, high-quality results, ideal for intricate designs.
  • DIY Engraving (Router bits or Hand-held Engraver): Offers more control and a personalized touch but requires practice and precision.

Finishing Touches and Presentation

Once the engraving is complete, give your cutting board a final sanding to smooth any rough edges from the engraving process. Apply another coat of food-safe mineral oil or cutting board conditioner, allowing it to absorb completely. This enhances the wood's natural beauty and protects the engraving. Before presenting your gift, consider adding a final touch. A beautiful ribbon tied around the cutting board, or a personalized card with a heartfelt message, elevates the gift to a truly memorable keepsake. Your personalized engraved cutting board will not only serve as a practical kitchen tool but also a cherished reminder of your thoughtfulness and creativity.

Share:

Plans for a Large Ottoman Table Perfect for Family Gatherings

The Ultimate Family Gathering Ottoman Table: A DIY Dream (or a Smart Buy!)

Okay, so picture this: It's Thanksgiving, Christmas, or maybe just a random Sunday afternoon. The whole family's gathered, the food's amazing, and everyone's crammed around a tiny coffee table, balancing plates precariously on their laps. Sounds familiar, right? That's why I'm obsessed with the idea of a huge, glorious ottoman table â€" the kind that’s the centerpiece of the gathering, not a tiny afterthought. This isn't just *any* ottoman; we're talking a majestic beast that can comfortably seat everyone, hold all the food, and even double as extra seating if needed!

Designing Your Dream Ottoman Table: Size Matters!

Before we get carried away with fabric choices and nail-head trim (oh, the possibilities!), let's talk size. This is crucial. You need to think about your family's size, your space, and the kind of gatherings you usually host. A table that̢۪s too small will feel cramped, but one that̢۪s too big will swallow your living room whole.

Measuring Your Space: A Crucial First Step

Grab a measuring tape (and maybe a friend to help!) and carefully measure the area where you plan to put the ottoman table. Consider the walkway space around it â€" you need enough room to move comfortably. Don't forget to account for furniture placement, doorways, and the overall flow of your room. A sketch can be really helpful here. Seriously, even a scribble on a napkin will be better than nothing!

Choosing the Right Dimensions: Think Big (But Smartly!)

For a truly family-friendly ottoman table, you'll want something substantial. I̢۪m talking at least 6 feet long, maybe even longer, depending on your family's size. The width should be generous enough to comfortably accommodate everyone without feeling overcrowded. Think at least 3 feet wide, maybe even more. The height should be comfortable for seated conversation and eating, typically around 18-20 inches.

Remember, you're not just building a coffee table; you're creating a central hub for family fun. So don't be afraid to go big, but do it thoughtfully, considering the scale of your room.

Building vs. Buying: Weighing Your Options

Now for the big decision: build it yourself or buy it ready-made? Both have their pros and cons.

The DIY Route: A Labor of Love

Building your own ottoman table is a fantastic project if you're handy with tools and have some woodworking experience. You get complete control over the design, materials, and dimensions. Plus, there's a certain satisfaction that comes with creating something from scratch. However, it takes time, effort, and requires purchasing materials and tools. It might also need a little more elbow grease than you expect.

The Store-Bought Option: Convenience and Speed

Buying a pre-made ottoman table offers convenience and speed. You can find a wide variety of styles, sizes, and materials readily available. You avoid the hassle of construction, and you can get it delivered right to your door. However, you might have less control over the exact design and size, and it might be more expensive than building it yourself.

Choosing Materials: Style and Durability

Regardless of whether you're building or buying, choosing the right materials is key to longevity and aesthetics. You want something durable enough to withstand years of family gatherings, but also stylish enough to complement your home decor.

The Base: Solid Foundation

For the base, consider sturdy wood like oak or mahogany for a classic look, or go for a more modern feel with metal legs or a solid frame. If you are building it yourself, this is going to take the most time and effort so plan accordingly.

The Upholstery: Comfort and Style

The upholstery is where you can really get creative! Think about durability and ease of cleaning. A durable fabric like microfiber or performance velvet is ideal for families. Leather or faux leather is also a great option, especially for easy cleaning. Choose a color and pattern that complements your room and personal style.

Adding the Finishing Touches: Making it Special

Once you have the basic structure, it's time to add those finishing touches that truly make the ottoman table special.

Customizable Details: Nailheads, Braids, and More

Consider adding nailhead trim for a touch of elegance, or braided trim for a rustic feel. You can even add casters (wheels) for easy movement, especially if it's a really large piece.

Storage Solutions: Hidden Compartments

If you̢۪re building it, think about incorporating storage. Hidden compartments under the cushions or inside the base are perfect for storing blankets, games, or remotes, keeping your living room organized.

Pillows and Throws: Comfort and Warmth

Don't forget about comfy pillows and throws! These add extra seating and create a cozy, inviting atmosphere.

Commonly Asked Questions (FAQs)

  • Q: How much weight can a large ottoman table hold? A: It depends on the materials and construction. A well-built ottoman table should be able to hold a significant amount of weight, but it's always best to check the manufacturer's specifications or consider the materials you use if building it yourself.
  • Q: How do I clean an upholstered ottoman table? A: This depends on the fabric. Always check the care instructions on the upholstery label. For most fabrics, spot cleaning with a mild detergent and water is usually sufficient. For tougher stains, you may need professional cleaning.
  • Q: How much does a large ottoman table cost? A: The cost varies greatly depending on the size, materials, and whether you build it yourself or buy it pre-made. Expect to pay anywhere from a few hundred dollars to several thousand dollars for a high-end piece.
  • Q: What kind of wood is best for building an ottoman table? A: Hardwoods like oak, mahogany, or walnut are excellent choices due to their durability and strength. Softer woods like pine might be suitable if you're using reinforced supports, but are less durable in the long run.
  • Q: Can I add wheels to a store-bought ottoman table? A: This depends on the design of the ottoman and the type of feet it has. Some ottoman bases might have existing holes to add wheels. Others may require some modification or might not be suitable for adding wheels at all.

Ultimately, your perfect family gathering ottoman table is a reflection of your style and your family's needs. Whether you choose to DIY or buy, the goal is to create a welcoming and comfortable space where you can make lasting memories together. Happy building (or shopping!)

Share:

How to Create Vintage-Style Wood Signs That Sell

How to Create Vintage-Style Wood Signs That Sell

Crafting Vintage-Style Wood Signs That Sell: A Guide to Rustic Charm

Hey there, fellow creative soul! Ever feel drawn to the unique charm of vintage wood signs? Those weathered, handwritten beauties that whisper stories of simpler times? Well, you're not alone! This rustic aesthetic is seriously hot right now, and the demand for these one-of-a-kind pieces is booming. So, if you're ready to tap into this trend and turn your crafting passion into a profitable venture, you've come to the right place. In this guide, I'll walk you through the ins and outs of creating vintage-style wood signs that'll have people saying "Wow!" and reaching for their wallets.

Choosing the Perfect Wood for Your Vintage Vibe

The foundation of any amazing vintage wood sign is, well, the wood! This isn't the time for sleek, modern surfaces; we're going for that authentic, lived-in feel. Here's your wood cheat sheet:

Reclaimed Wood: The King of Rustic

* **What it is:** Think salvaged wood from old barns, sheds, or even flooring. Each piece has a unique story etched into its grain. * **Why it's awesome:** Offers unparalleled character, knots, and imperfections, adding instant vintage appeal. * **Where to find it:** Check out salvage yards, antique shops, or even your own attic! You can also buy reclaimed wood boards from online retailers.

Rustic Pine: The Budget-Friendly Choice

* **What it is:** A readily available and relatively inexpensive option. While it might lack the extreme character of reclaimed wood, it can still be easily distressed to achieve a vintage look. * **Why it's awesome:** It's easy to work with, takes stain and paint well, and is a great starting point for beginners. * **Where to find it:** Most hardware stores and lumber yards carry pine boards.

Other Options: Expanding Your Horizons

* **Barnwood:** Often used for wall art, adds a touch of country charm. * **Walnut or Cherry:** For a richer, more elegant vintage style. * **Pallet wood:** A trendy and eco-friendly choice, but be mindful of the potential for chemicals.

Crafting Your Vintage-Style Wood Sign: From Blank Slate to Statement Piece

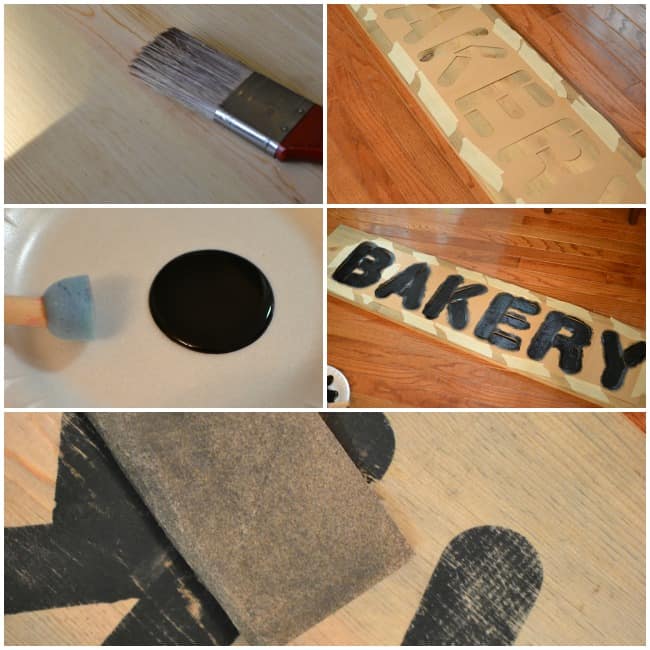
Once you've got your wood, it's time to unleash your inner artist! Here's a step-by-step guide to crafting a vintage masterpiece:

1. Prep Your Canvas: The Foundation of Success

* **Sand it down:** Smooth out any rough spots to make your sign surface even. * **Clean it thoroughly:** Remove dust and debris to ensure paint or stain adheres properly. * **Consider a primer:** This helps paint or stain adhere more evenly, especially on wood with variations in grain or texture.

2. The Art of Distressing: Creating that Vintage Feel

* **Embrace the imperfections:** Don't aim for a pristine finish! Use sandpaper to create a worn, aged appearance. * **Experiment with techniques:** Try sanding edges, chiseling corners, or hammering the surface for a distressed look. * **Go for a weathered look:** Use sandpaper or a wire brush to create a faded, weathered effect.

3. Painting or Staining: Adding Color and Depth

* **Choose your color palette:** Opt for muted, earthy tones that complement the vintage style. Think blues, greens, reds, or even creamy whites. * **Use multiple layers:** Apply thin coats of paint or stain for a more natural, layered look. * **Try crackling paint:** This technique creates a unique, antique-inspired texture.

4. Lettering and Design: The Heart of Your Message

* **Choose your font:** Go for classic fonts like script, serif, or vintage-inspired lettering. * **Experiment with stencils:** Create precise designs with a stencil and paint or a paint pen. * **Hand-painted lettering:** For a truly handcrafted look, use a steady hand and a good quality paint brush. * **Use stamps:** Create repetitive patterns or text with a stamp.

5. Finishing Touches: Adding the Final Flourishes

* **Distressed edges:** Use sandpaper or a wire brush to highlight the edges and create a more weathered look. * **Hardware:** Add vintage-inspired knobs, hinges, or hooks to complete the rustic look. * **Sealing the deal:** Use a clear sealant to protect your sign from moisture and wear.

Marketing Your Vintage Wood Signs: Reaching Your Ideal Customer

You've created beautiful vintage wood signs, but how do you get them into the hands of eager buyers? Here are some marketing strategies:

1. Showcase Your Creations Online

* **Etsy:** A popular marketplace for handmade goods, particularly those with a vintage aesthetic. * **Instagram:** Create an eye-catching profile, use relevant hashtags, and share behind-the-scenes glimpses of your crafting process. * **Facebook:** Connect with potential customers through a business page, share photos of your signs, and run targeted ads. * **Your own website:** Build a professional website with high-quality photos, detailed descriptions, and secure online ordering.

2. Local Markets and Craft Fairs

* **Get out there:** Attend local craft fairs, farmer's markets, and community events. * **Create a captivating booth:** Showcase your signs in an attractive, inviting display. * **Engage with visitors:** Be friendly, enthusiastic, and ready to answer questions.

3. Networking and Collaboration

* **Connect with other artisans:** Collaborate on projects, cross-promote each other's work, and expand your reach. * **Partner with local businesses:** Offer your signs for sale in shops, cafes, or restaurants. * **Join craft guilds or groups:** Network with fellow creatives and stay up-to-date on trends.

Frequently Asked Questions

1. How can I make my vintage wood signs unique?

* **Incorporate your personal style:** Use your signature colors, fonts, and design elements. * **Add a personal touch:** Create signs with meaningful quotes, family names, or personalized messages. * **Focus on a specific theme:** Specialize in signs for specific events, hobbies, or aesthetics. * **Experiment with different materials:** Incorporate salvaged metal, vintage buttons, or other unique elements.

2. What kind of paints work best for a vintage look?

* **Chalk paint:** Creates a matte, chalky finish that's perfect for distressing. * **Acrylic paint:** Versatile and easy to use, available in a wide range of colors. * **Milk paint:** A natural paint that creates a soft, aged look. * **Distressed paint:** A type of acrylic paint that's specially formulated to crack and chip, giving a weathered effect.

3. How do I price my vintage wood signs?

* **Factor in costs:** Consider the cost of materials, time spent creating the sign, and any shipping or handling costs. * **Research your competition:** See what similar signs are selling for online and at local markets. * **Value your craftsmanship:** Don't undervalue your skills and creativity.

4. What tools do I need to get started?

* **Sandpaper (various grits):** For sanding the wood and creating distressed effects. * **Screwdriver:** For attaching hardware or securing the sign to a wall. * **Measuring tape:** For accurate measurements and cutting wood to size. * **Saw (handsaw or jigsaw):** For cutting the wood to the desired shape. * **Brushes and rollers:** For applying paint and stain. * **Stencils:** For creating precise designs. * **Paint pens:** For hand-lettering or adding details.

5. Can I make a living selling vintage wood signs?

* **It's possible!** But like any creative business, it takes dedication, hard work, and marketing savvy. * **Start small:** Focus on building a solid foundation and gradually expand your business. * **Develop a strong brand:** Create a consistent style, high-quality products, and excellent customer service. * **Embrace online platforms:** Leverage social media and e-commerce platforms to reach a wider audience. I hope this guide has inspired you to create your own vintage-style wood signs! Remember, with a bit of creativity and passion, you can transform simple wood into beautiful, profitable art. So, grab your tools, choose your wood, and get ready to bring a touch of vintage charm to the world!
Share:

Christmas Wood Craft Ideas with Reclaimed Wood

Christmas Wood Craft Ideas with Reclaimed Wood

Christmas Wood Craft Ideas with Reclaimed Wood

Christmas is a time for giving, and what better way to show your loved ones you care than with a handmade gift? And let's be real, who doesn't love the warm, rustic charm of reclaimed wood? It's got character, history, and a unique beauty that you just can't replicate.

So, ditch the mass-produced plastic decorations this year and embrace the beauty of handmade. With a little creativity and some reclaimed wood, you can craft stunning Christmas decorations, gifts, and even home decor that will be treasured for years to come.

Ready to dive in? Let's get crafty!

Reclaimed Wood Christmas Ornaments

Ornaments are a classic Christmas decoration, and they're surprisingly easy to make with reclaimed wood.

Simple Shapes

For a minimalist look, cut out simple shapes like stars, hearts, circles, or even snowflakes from your reclaimed wood. Sand the edges smooth, and then paint them in festive colors or leave them natural for a rustic feel. You can even add some glitter or other embellishments to really make them pop.

Wooden Bead Ornaments

If you have some small pieces of reclaimed wood, you can turn them into adorable wooden beads. Simply drill a hole through the center of each piece and then string them together using twine, wire, or ribbon. You can paint them with festive colors, leave them natural, or add some cute Christmas-themed designs.

Personalized Ornaments

For a truly unique touch, create personalized ornaments with names, initials, or special dates engraved or painted onto the wood. These are wonderful keepsakes that your loved ones will cherish for years to come.

Reclaimed Wood Christmas Signs

Reclaimed wood signs are a popular choice for rustic Christmas decor. You can create festive signs with holiday sayings, greetings, or even personalized messages.

Christmas Greetings

Use reclaimed wood to create simple signs with classic Christmas greetings like "Merry Christmas," "Happy Holidays," or "Peace on Earth." You can even add some whimsical elements like snowflakes, stars, or even a little Santa Claus.

Personalized Signs

For a personalized touch, create signs with family names, special dates, or even a heartwarming quote. These signs can be displayed on your mantelpiece, on your front porch, or even given as a unique gift.

Family Traditions

If your family has a special tradition, why not capture it on a reclaimed wood sign? Think about the things that make your Christmas celebrations unique â€" a favorite family recipe, a Christmas game, or a beloved song â€" and create a sign that celebrates these traditions.

Reclaimed Wood Christmas Gift Ideas

Don't forget the power of a handmade gift! There are tons of unique and thoughtful gifts you can make using reclaimed wood.

Wooden Serving Trays

A rustic wooden serving tray is perfect for holding Christmas snacks, drinks, or even gifts. You can create a simple tray or get a little more elaborate with handles or decorative details.

Wine Bottle Holders

If you know someone who enjoys a good bottle of wine, consider crafting a rustic wooden wine bottle holder. You can create a simple holder for a single bottle or a more elaborate design for a collection of bottles.

Wooden Coasters

A set of rustic wooden coasters makes a practical and stylish gift. You can cut them into various shapes, add some decorative details, or even personalize them with initials or names.

Reclaimed Wood Christmas Decor

Beyond ornaments and signs, there are tons of other ways to incorporate reclaimed wood into your Christmas decor.

Christmas Tree Stand

A rustic wooden tree stand can add a unique touch to your Christmas decor. You can create a simple stand from reclaimed wood or get a little more creative with a decorative design.

Wreath Base

Reclaimed wood can also be used to create a beautiful wreath base. You can simply cut a circle of wood or get more intricate with a decorative design.

Christmas Candle Holders

Add a warm glow to your Christmas decor with handmade candle holders from reclaimed wood. You can create simple holders or add some decorative details to make them truly unique.

Tips for Working with Reclaimed Wood

Now that you're brimming with ideas, let's talk about the practical stuff. Working with reclaimed wood can be a lot of fun, but it does have its own quirks. Here are some tips to make your crafting experience smoother:

  • **Safety First:** Wear safety glasses and gloves while working with reclaimed wood, as it can be rough and splintery.
  • **Clean It Up:** Reclaimed wood can be dusty and even harbor some critters. Give it a good clean with a stiff brush and soapy water to remove any dirt or debris.
  • **Sand It Smooth:** Sand the wood to remove any rough edges or splinters. You can use a variety of sandpaper grits, starting with a rough grit and then moving to a finer grit for a smooth finish.
  • **Treat It Right:** You may need to treat the wood with a sealant or stain to protect it from moisture and wear.
  • Where to Find Reclaimed Wood

    Finding reclaimed wood is easier than you think!

  • **Local Salvage Yards:** A great starting point is your local salvage yard. You might be surprised at the treasures you find, and it's a great way to support your community and keep materials out of landfills.
  • **Online Retailers:** Many online retailers specialize in selling reclaimed wood. You can find a variety of wood types and sizes, often at reasonable prices.
  • **Ask Around:** Talk to your friends, neighbors, and family to see if they have any reclaimed wood they'd be willing to part with.
  • Commonly Asked Questions

    Here are some common questions about using reclaimed wood for Christmas crafts:

    What are some good wood types for Christmas crafts?

    Softwoods like pine and cedar are good choices for Christmas crafts as they're relatively easy to work with. Hardwoods like oak and maple can also be used, but they're a bit more challenging to cut and shape.

    What kind of tools do I need?

    The tools you need will depend on the project you're working on, but some basic tools include a saw, hammer, drill, screwdriver, sandpaper, and measuring tape.

    How do I finish my reclaimed wood projects?

    You can finish your projects with paint, stain, or sealant. Consider the look you're going for and the type of wood you're using when choosing a finish.

    Remember, the key to creating beautiful reclaimed wood Christmas crafts is to have fun and embrace your creativity! There are no right or wrong ways to do it, so experiment, try new things, and most importantly, enjoy the process.

    Share:

    Creative Birdhouse Designs for Craft Fairs

    Creative Birdhouse Designs for Craft Fairs

    Creative Birdhouse Designs for Craft Fairs

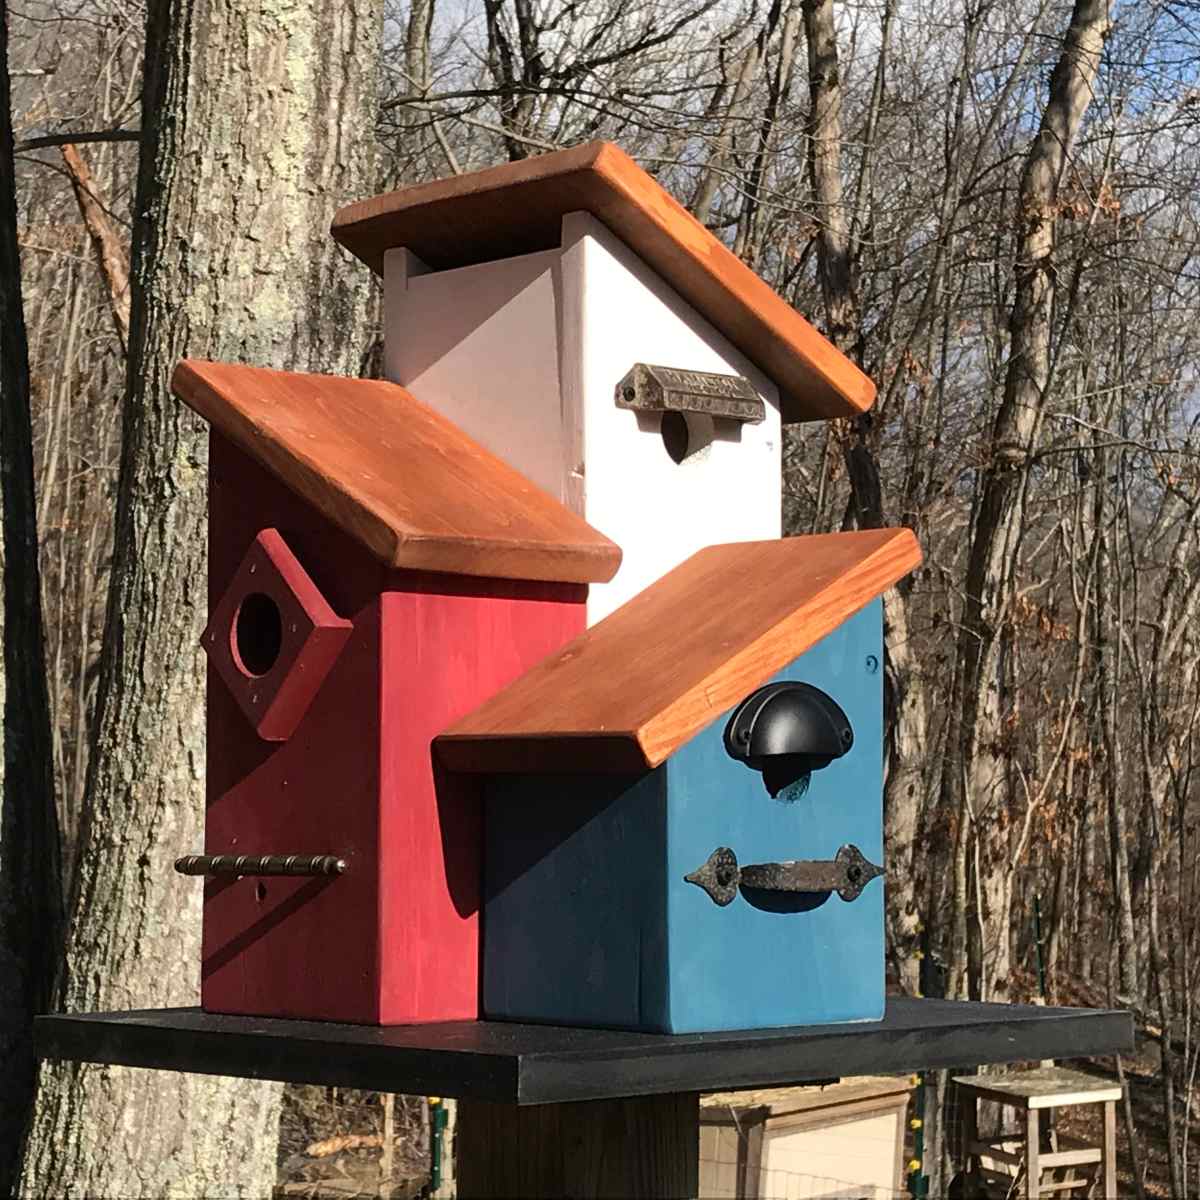
    Craft fairs are a popular venue for artisans to showcase their creativity and connect with potential customers. Birdhouses, with their inherent charm and practicality, make excellent additions to any craft fair booth. This article explores captivating birdhouse designs that can attract attention and bring joy to bird lovers.

    Beyond the Basic: Exploring Unique Birdhouse Designs

    While traditional birdhouses remain popular, embracing unconventional designs can distinguish your craft fair offerings. Consider these imaginative approaches:

    Nature-Inspired Birdhouses

    Draw inspiration from the natural world for a truly unique design.

    • Log Houses: Use hollowed-out logs or branches to create rustic and charming birdhouses. Consider incorporating bark, moss, or twigs for a natural touch.
    • Mushroom Homes: Fashion birdhouses from mushroom caps or create whimsical designs resembling miniature toadstools.
    • Birdhouse-Cactus Fusion: Combine the appeal of a birdhouse with a whimsical cactus design. This can be done with painted wood or by incorporating real cactus spines for a unique and desert-inspired look.

    Whimsical and Fantasy-Inspired Birdhouses

    Embrace the power of imagination to create birdhouses that are both enchanting and eye-catching.

    • Fairy Houses: Create tiny, elaborate houses adorned with miniature doors, windows, and decorative elements, perfect for fairy gardens or whimsical settings.
    • Storybook Birdhouses: Design birdhouses inspired by your favorite children's books. For example, create a gingerbread house for Hansel and Gretel, or a cozy cottage for the Three Little Pigs.
    • Pirate Ships: Transform a birdhouse into a swashbuckling pirate ship, complete with sails, a crow's nest, and even tiny pirate figures.

    Theme-Based Birdhouses

    Capitalize on popular themes and holidays to appeal to a wider audience.

    • Seasonal Birdhouses: Create birdhouses adorned with seasonal elements like autumn leaves, winter snowflakes, or spring flowers.
    • Holiday Birdhouses: Design festive birdhouses for special holidays like Christmas, Easter, or Halloween, incorporating traditional colors and decorations.
    • Sports-Themed Birdhouses: Design birdhouses in the colors and logos of popular sports teams, appealing to sports enthusiasts.

    Materials and Construction: A Blend of Tradition and Innovation

    While traditional wood remains a popular material for birdhouses, explore alternative options to add unique character and appeal.

    Beyond Wood: Embracing Alternative Materials

    Beyond traditional wood, explore a range of materials to create eye-catching and functional birdhouses:

    • Recycled Materials: Upcycle materials like tin cans, wooden crates, or even old teacups to create quirky birdhouses.
    • Ceramic and Clay: Craft durable and artistic birdhouses from ceramic or clay. These can be painted in vibrant colors or left with a natural finish.
    • Metal: Use metal sheet or scrap metal to create modern, industrial-style birdhouses.

    Construction Techniques: Adding a Personal Touch

    Experiment with different construction techniques to add complexity and personality to your birdhouses.

    • Carving: Intricate carvings add depth and character to wood birdhouses.
    • Mosaics: Use colorful tiles, glass pieces, or even broken china to create mosaic birdhouses.
    • Decoupage: Add pattern and texture to birdhouses by decoupaging them with paper, fabric, or maps.

    Marketing Your Birdhouse Creations: A Call to Action

    To ensure your birdhouses attract attention at craft fairs, implement a strategic marketing approach.

    Display and Presentation: First Impressions Matter

    A visually appealing display can make or break your birdhouse sales.

    • Theme-Based Displays: Group your birdhouses by theme, such as nature-inspired, whimsical, or holiday-themed, to create a cohesive look.
    • Interactive Displays: Include miniature bird figurines or colorful birdseed to add a sense of life and engagement to your display.
    • Eye-Catching Signage: Use colorful and informative signage to highlight your unique designs and craftmanship.

    Storytelling: Connecting with Customers

    Sharing the story behind your birdhouses adds depth and personalization to your craft fair experience.

    • Crafting Process: Explain the process behind creating your birdhouses, highlighting the materials, techniques, and inspiration you used.
    • Customer Feedback: Encourage customers to share their own experiences with birds and birdwatching, fostering a sense of connection and shared passion.

    Pricing and Promotions: Balancing Value and Affordability

    Pricing your birdhouses fairly while remaining competitive is crucial for success at craft fairs.

    • Cost Analysis: Calculate your material costs, labor time, and overhead to determine a fair price.
    • Competitive Research: Research the pricing of similar birdhouses at other craft fairs to gauge market value.
    • Special Offers: Consider offering discounts for multiple purchases or create limited-edition birdhouses as special promotions.

    By embracing creative designs, innovative materials, and thoughtful marketing, you can transform your birdhouse creations into captivating pieces that draw crowds and enhance the beauty of any home or garden.

    Share:

    How to Build Custom Wooden Key Holders for Extra Income

    How to Build Custom Wooden Key Holders for Extra Income

    How to Build Custom Wooden Key Holders for Extra Income

    Hey there, crafty folks! Ever thought about turning your woodworking skills into a side hustle? Well, I̢۪m here to tell you, building custom wooden key holders is a great way to do just that. It's a project that's relatively easy to learn, can be tailored to your individual style, and offers a ton of customization potential.

    Why Wooden Key Holders?

    Think about it â€" everyone needs a place to hang their keys. Key holders are a practical necessity in any home, and there’s a growing demand for unique, handcrafted items that add personality and warmth to living spaces. Plus, wooden key holders are a great way to add a touch of rustic charm to any decor, and they can easily be personalized with engravings, paint, or even unique hardware.

    Getting Started: The Tools and Materials

    First things first, you'll need to gather your tools and materials. Here̢۪s what you̢۪ll need for a basic project:

    Tools:

    • Table saw
    • Miter saw or chop saw
    • Drill press or hand drill
    • Sandpaper (various grits)
    • Clamps
    • Measuring tape
    • Pencil
    • Wood glue
    • Safety glasses and gloves

    Materials:

    • Hardwood lumber (maple, walnut, oak, etc.)
    • Key hooks (metal, ceramic, or wooden)
    • Finishing oil or sealant (optional)
    • Paint or stain (optional)
    • Hardware (screws, nails, etc.)

    Designing Your Key Holder: Unleash Your Creativity

    Now comes the fun part â€" designing your key holder! Here’s where you can really let your creativity shine:
    • Shape and Size: Consider a simple rectangular design, a stylishly curved shape, or a more complex design with shelves or compartments. Play with different sizes to find what fits your vision.
    • Wood Selection: Choose a hardwood like maple, walnut, oak, or cherry for durability and rich aesthetics. Remember, different woods have different textures and colors, adding to the unique character of your key holder.
    • Key Hooks: Opt for metal hooks for a modern look, or choose ceramic or wooden hooks for a vintage touch. You can even incorporate a unique key holder design, like a coat rack or a wall-mounted organizer.
    • Personalization: Add a personal touch with engravings, painting, or adding a unique design element.

    Building Your Key Holder: Step-by-Step Guide

    Now for the hands-on part:

    Step 1: Cut Your Wood Pieces

    Cut your hardwood lumber to the desired size and shape using your table saw, miter saw, or chop saw. Be sure to use accurate measurements and make clean cuts.

    Step 2: Assemble the Key Holder

    Using wood glue, assemble the different parts of your key holder according to your design. Clamp the pieces together tightly to ensure a secure bond and let the glue dry completely.

    Step 3: Attach the Key Hooks

    Mark the locations for your key hooks on the key holder̢۪s surface. Using your drill press or hand drill, create pilot holes for your screws or nails. Then, attach the key hooks securely to the wood.

    Step 4: Sand and Finish

    Sand your key holder thoroughly using sandpaper of different grits. Start with coarse sandpaper and work your way to fine sandpaper to achieve a smooth finish. Apply finishing oil or sealant to protect the wood and enhance its natural beauty.

    Step 5: Optional Personalization

    This is your chance to add a personal touch. Paint or stain your key holder, add engravings, or incorporate other unique design elements. Let your imagination run wild!

    Selling Your Key Holders: Finding Your Market

    You̢۪ve got a beautiful, handcrafted wooden key holder, now it̢۪s time to get it into the hands of appreciative customers! Here are some ways to market your creations:
    • Etsy: Etsy is a popular online marketplace specifically for handcrafted and vintage items. It's an excellent platform for showcasing your unique key holders and reaching a global audience.
    • Craft Fairs and Markets: Participating in local craft fairs and markets is a fantastic way to connect with potential customers face-to-face. It gives you the chance to showcase your work, answer questions, and get direct feedback.
    • Social Media: Utilize social media platforms like Instagram, Facebook, and Pinterest to promote your key holders. High-quality photos and engaging captions will help you capture attention and grow your following.
    • Local Stores: Approach local home décor stores, gift shops, or even coffee shops to see if they're interested in selling your handcrafted key holders.
    • Word-of-Mouth: Don't underestimate the power of word-of-mouth. Show off your creations to friends, family, and colleagues â€" they might just become your first customers!

    Commonly Asked Questions

    What type of wood is best for key holders?

    Hardwoods like maple, walnut, oak, and cherry are ideal for key holders due to their durability and beautiful grain patterns. They̢۪re also naturally resistant to scratches and dents, making them perfect for a high-use item like a key holder.

    How do I price my wooden key holders?

    When pricing your key holders, consider the cost of materials, your time spent making them, and the level of customization involved. Research what similar handcrafted key holders sell for on Etsy or other marketplaces. Remember to factor in your time and skills!

    How can I make my key holders more unique?

    Embrace your creativity! Add intricate carvings, personalized engravings, custom paint jobs, or incorporate unique hardware like antique door knobs. The possibilities are endless.

    Where can I find inspiration for key holder designs?

    Look around your own home, scour online marketplaces, and browse through design magazines for inspiration. You can even ask friends and family what kind of key holder they̢۪d love to have.

    What if I'm a beginner woodworker?

    Don't worry, starting simple is key! Begin with a basic rectangular design and gradually work your way up to more complex shapes. There are countless tutorials and online resources to guide you along the way. Just remember to prioritize safety and practice makes perfect! There you have it! Building custom wooden key holders is a rewarding and potentially lucrative way to turn your passion into a side hustle. With a little creativity, dedication, and a whole lot of sanding, you can be on your way to creating beautiful and functional key holders that bring joy to your customers and add a touch of warmth to any home.
    Share:

    Profitable Blanket Ladder Designs for Every Budget

    Profitable Blanket Ladder Designs for Every Budget

    Profitable Blanket Ladder Designs for Every Budget

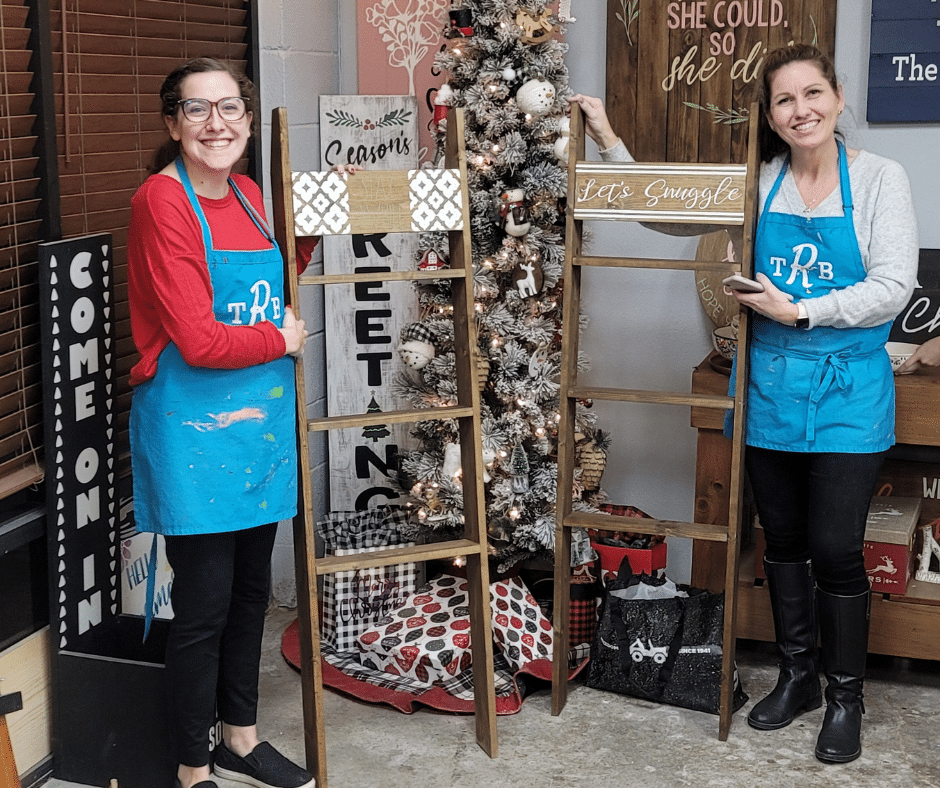
    In the realm of home décor, functionality meets aesthetics in the form of blanket ladders. These versatile pieces serve as both storage solutions and eye-catching focal points, adding warmth and charm to any living space. If you're looking to tap into the growing demand for blanket ladders and start a profitable business, this comprehensive guide will equip you with the knowledge to craft designs that cater to diverse budgets and preferences.

    Understanding Blanket Ladder Market Demand

    The popularity of blanket ladders is fueled by several factors, including the increasing emphasis on creating cozy and inviting homes, the desire for stylish and functional storage solutions, and the growing trend of farmhouse and rustic décor. This presents a lucrative opportunity for entrepreneurs to cater to a wide range of customers with diverse tastes and budgets.

    Crafting Profitable Blanket Ladder Designs

    The key to crafting profitable blanket ladder designs lies in understanding the nuances of different budget segments and tailoring your creations accordingly. Here's a breakdown of design strategies for various price points:

    Budget-Friendly Designs

    For customers seeking affordable options, simplicity and practicality are key. Here are some ideas:

    • Simple Ladder Design: Utilize readily available materials like pine or fir wood and focus on a basic, ladder-like structure with a few rungs.
    • Minimalist Style: Opt for a clean, uncluttered design with minimal embellishments. Consider using a natural wood finish or a simple paint job.
    • DIY Kits: Offer pre-cut pieces of wood and assembly instructions, allowing customers to build their own ladders at a lower cost.
    • Compact Size: Design smaller ladders suitable for smaller spaces, such as bedrooms or dorm rooms.

    Mid-Range Designs

    Customers in this segment value both aesthetics and functionality. Consider these design elements:

    • Sturdier Materials: Opt for hardwoods like oak or walnut, known for their durability and attractive grain patterns.
    • Unique Rung Shapes: Experiment with rounded, curved, or angled rungs for visual interest.
    • Distressed Finishes: Create a vintage or farmhouse feel with distressed paint or stain finishes.
    • Functional Extras: Incorporate features like hooks for hanging hats or scarves or shelves for additional storage.

    Luxury Designs

    For high-end customers, bespoke creations and premium materials are paramount. Consider these options:

    • Customizable Options: Offer various wood species, finishes, and hardware choices to allow for personalized designs.
    • Intricate Details: Incorporate ornate carvings, hand-painted details, or metal accents for a luxurious touch.
    • Unique Shapes: Experiment with unconventional ladder shapes, such as arched, angled, or curved designs.
    • Collaborations: Partner with local artists or craftspeople to create one-of-a-kind pieces with artistic flair.

    Optimizing Profitability

    To ensure profitability, focus on these key aspects:

    Material Sourcing

    • Bulk Purchasing: Negotiate discounts by buying materials in bulk, especially for frequently used items like wood and hardware.
    • Sustainable Options: Consider using reclaimed or salvaged wood for a unique aesthetic and eco-friendly approach.
    • Local Suppliers: Build relationships with local lumberyards or wood suppliers to secure quality materials at competitive prices.

    Manufacturing Efficiency

    • Standardize Designs: Create a few core designs that can be easily replicated, minimizing production time and material waste.
    • Invest in Tools: Invest in woodworking tools and equipment to increase efficiency and precision, reducing errors and rework.
    • Optimize Workflows: Implement streamlined processes for cutting, sanding, assembling, and finishing, ensuring smooth production.

    Pricing and Marketing

    • Competitive Research: Analyze prices of similar products from competitors to set competitive pricing based on value and quality.
    • Value-Based Pricing: Emphasize the craftsmanship, durability, and aesthetic appeal of your ladders to justify premium pricing for high-end designs.
    • Online Marketplaces: Utilize online platforms like Etsy, Amazon Handmade, or Shopify to reach a wider audience and showcase your designs.
    • Social Media Marketing: Engage with potential customers through platforms like Instagram, Pinterest, and Facebook, showcasing eye-catching visuals and showcasing the functionality of your ladders.
    • Collaborations: Partner with home décor bloggers, influencers, or interior designers to gain exposure and build credibility.

    Conclusion

    By understanding market demand, tailoring designs to diverse budgets, optimizing profitability, and employing effective marketing strategies, you can establish a thriving business selling profitable blanket ladders. Remember, the key to success lies in creating high-quality products that cater to specific needs and preferences while maintaining a competitive edge in the market. As you embark on your entrepreneurial journey, embrace creativity, innovation, and customer-centricity to ensure lasting success in the world of home décor.

    Share:

    Luxurious Woodworking Gifts: Exquisite and One-of-a-Kind

    Luxurious Woodworking Gifts: Exquisite and One-of-a-Kind

    Luxurious Woodworking Gifts: Exquisite and One-of-a-Kind

    In a world saturated with mass-produced goods, handcrafted gifts stand out as truly special tokens of affection and appreciation. Woodworking, with its rich history and enduring beauty, offers a unique avenue to create luxurious gifts that exude both elegance and sentimentality. These are not just presents; they are pieces of art, each one bearing the distinct mark of the woodworker's skill and passion.

    Whether you're searching for a birthday surprise, a wedding present, or a corporate gift that leaves a lasting impression, exploring the world of luxurious woodworking gifts opens up a realm of possibilities. These gifts go beyond mere functionality, becoming cherished keepsakes that enhance the recipient's home décor and create a lasting sense of value and pride.

    Unveiling the Beauty of Handcrafted Wooden Gifts

    The beauty of woodworking lies in its ability to transform raw materials into exquisite objects that possess a unique character. Each piece of wood, with its inherent grain patterns and natural variations, tells a story of its journey from the forest to the workshop. The woodworker, with their mastery of tools and techniques, brings this story to life, creating pieces that are both functional and aesthetically pleasing.

    Handcrafted wooden gifts are not just objects; they are investments in quality and durability. Unlike mass-produced items, these pieces are built to last, becoming heirlooms that can be passed down through generations.

    Exploring the Diverse World of Luxurious Woodworking Gifts

    The world of luxurious woodworking gifts is as diverse as the woods themselves. From intricate hand-carved sculptures to elegant wooden jewelry boxes, there is a gift for every taste and occasion.

    Timeless Elegance: Wooden Jewelry Boxes

    A wooden jewelry box, crafted with precision and adorned with intricate details, is a gift that exudes timeless elegance. It provides a safe and stylish haven for cherished pieces, transforming everyday rituals into moments of luxury. Imagine the joy of opening a beautifully crafted box, each time discovering the sparkle of treasured jewelry.

    Practical Luxury: Personalized Cutting Boards

    A personalized cutting board, engraved with a name, initials, or a special message, combines practicality with personalization. It's a gift that speaks to the recipient's love of cooking and their appreciation for unique, handcrafted items. Crafted from durable hardwoods like maple or walnut, these cutting boards are built to withstand the rigors of everyday use, becoming a cherished kitchen companion.

    Artful Expressions: Wooden Sculptures

    For those who appreciate art, a handcrafted wooden sculpture is a truly unique and meaningful gift. Whether it's a minimalist abstract piece or a detailed figurative sculpture, each one reflects the artist's vision and skill. These sculptures can transform a room, adding a touch of sophistication and personality to any space.

    Sentimental Gifts: Wooden Photo Frames

    A wooden photo frame, handcrafted with care, can elevate a simple photograph into a treasured memory. It's a gift that speaks to the heart, capturing the essence of a special moment and preserving it for years to come. Imagine the joy of displaying a family photo in a frame that is as beautiful as the memories it holds.

    Crafting a Gift that Speaks Volumes

    A luxurious woodworking gift goes beyond the tangible object; it represents a commitment to quality, craftsmanship, and personal touch. When you choose a handcrafted gift, you're not just giving a present, you're sharing a story, a piece of artistry, and a tangible expression of your affection.

    Whether you choose a classic wooden box, a functional cutting board, or a captivating sculpture, a handcrafted gift from a woodworker is a treasure that will be cherished for years to come. It's a gift that speaks to the heart and leaves a lasting impression, reminding the recipient of your thoughtfulness and the beauty of handmade creations.

    Share:

    Rustic DIY Coffee Table Build with Free Plans PDF

    Rustic DIY Coffee Table Build with Free Plans PDF

    Rustic DIY Coffee Table Build with Free Plans PDF

    Craving a touch of rustic charm in your living room? Building your own coffee table is a rewarding project that lets you personalize your space and save some money. We've got you covered with a free PDF plan for a beautiful, rustic coffee table that will make you the envy of all your friends! This project is perfect for beginner woodworkers and requires minimal tools and materials, making it accessible and enjoyable.

    Why Build Your Own Rustic Coffee Table?

    Building your own furniture offers a sense of accomplishment and allows you to customize it to your liking. A rustic coffee table, with its natural wood tones and unique character, brings warmth and personality to your home. Here are some compelling reasons to embark on this project:

    • Unique Style: No two pieces of wood are alike, adding a one-of-a-kind element to your table.
    • Save Money: You can often create a beautiful coffee table for less than what you'd pay in stores.
    • Personalization: Choose the wood type, stain, and even the size to perfectly fit your space and style.
    • Learning Experience: This project is a great way to learn basic woodworking skills.

    Free DIY Coffee Table Plans PDF

    Don't worry about starting from scratch! We've created a comprehensive PDF plan that guides you through every step, from material selection to finishing touches. Our plans include:

    • Detailed Diagrams: Clear illustrations to help you visualize the construction process.
    • Cut Lists: Precise measurements for each piece of wood to ensure a perfect fit.
    • Step-by-Step Instructions: Easy-to-follow instructions that break down the project into manageable steps.
    • Material List: A complete list of materials you'll need, including wood, hardware, and finishing supplies.

    Materials You'll Need

    For this rustic coffee table, you'll mainly need:

    • Wood: Reclaimed wood or rough-cut lumber for a true rustic look.
    • Hardware: Screws, glue, wood filler, and finishing nails.
    • Tools: Saw, drill, sander, measuring tape, and level.
    • Finishing Supplies: Wood stain, polyurethane, and brushes.

    Building Your Rustic Coffee Table

    Once you have your materials and tools, you're ready to start building! The plans provide step-by-step instructions that guide you through the following key steps:

    • Cutting the Wood: Accurately cut the wood pieces to the sizes listed in the plans.
    • Assembling the Frame: Join the wood pieces to create the sturdy frame of the coffee table.
    • Adding the Top: Secure the table top to the frame, ensuring a level and even surface.
    • Finishing Touches: Sand the table smooth, apply wood stain (if desired), and seal it with polyurethane for a protective finish.

    Enjoy Your Rustic Coffee Table

    After your hard work, you'll have a beautiful, handmade rustic coffee table that you can be proud of! This table will add character and warmth to your home while serving as a reminder of your woodworking skills. Don't forget to share your creation with us and inspire others to create their own!

    Ready to embark on your rustic DIY journey? Download our free PDF coffee table plans now and bring your vision to life. Happy building!

    Share:

    Popular Posts

    Powered by Blogger.

    Labels

    Pages